
As Spring approaches, I lean towards bright blooms. With Mother's Day around the corner, I created this bright vellum floral box perfect for keepsakes! Hello, it is Teri with TerisMailbox posting for CutCardStock.
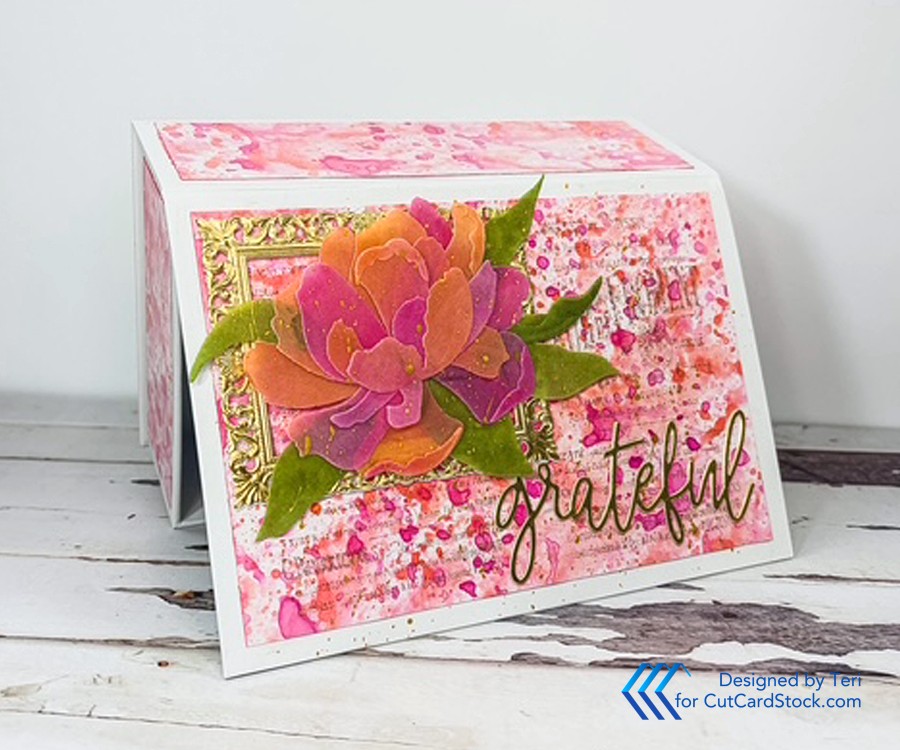
This project started with a sturdy white box with a magnetic catch. I couldn't let it go to waste!
Start with the Ink Smooshed Panels
I have been playing around with inks on Vellum and Kromecote Cardstock. I love the tones you can create!
Start with a 5.5 x 8.5 inch piece of White Kromecote Cardstock. Add one Distress Ink color to your craft mat, add a little water spritz and run your fingers through to break up the color. Dab the Kromecote into the ink, rotating and dipping until you are happy with the color. Use a heat tool to dry this layer. Clean the mat and use the next darker color and repeat. Keep going with additional similar ink colors until you are happy with the base. Be sure it is completely dry and then add Micro Glaze to seal the panel.
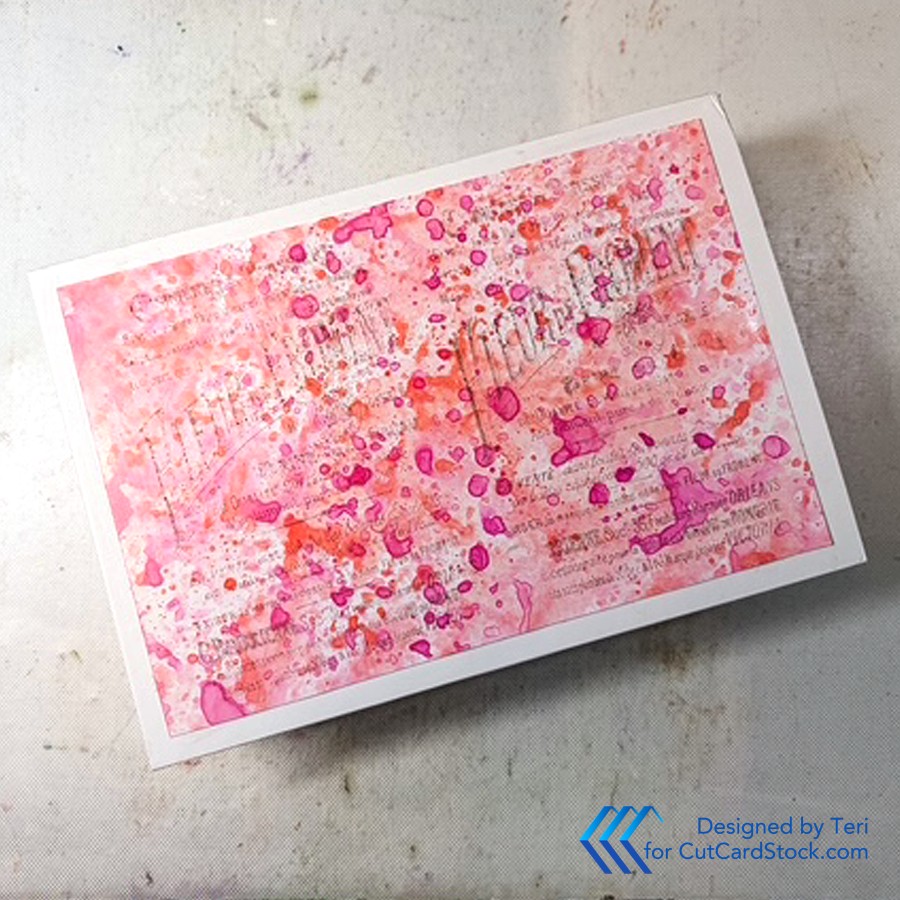
Measure the box sides and top and then trim the panel to cover the areas leaving a small margin all around. Glue the panels in place and allow plenty of time to dry. I placed acrylic block on top of each area to assure I had good coverage.
After the panels are dry, use Archival Ink plus a sentiment stamp of choice to stamp on the top to add interest.
Create the Vellum Floral Image
Add Distress ink to the 65lb. Translucent Vellum Cardstock in coordinating colors. I mixed the Coral and Pink colors to create areas of different colors. After the Vellum is completely dry, die cut the petals and leaves using the Pink Star Tulip Die set from Altenew. I love the size of this gorgeous bloom.
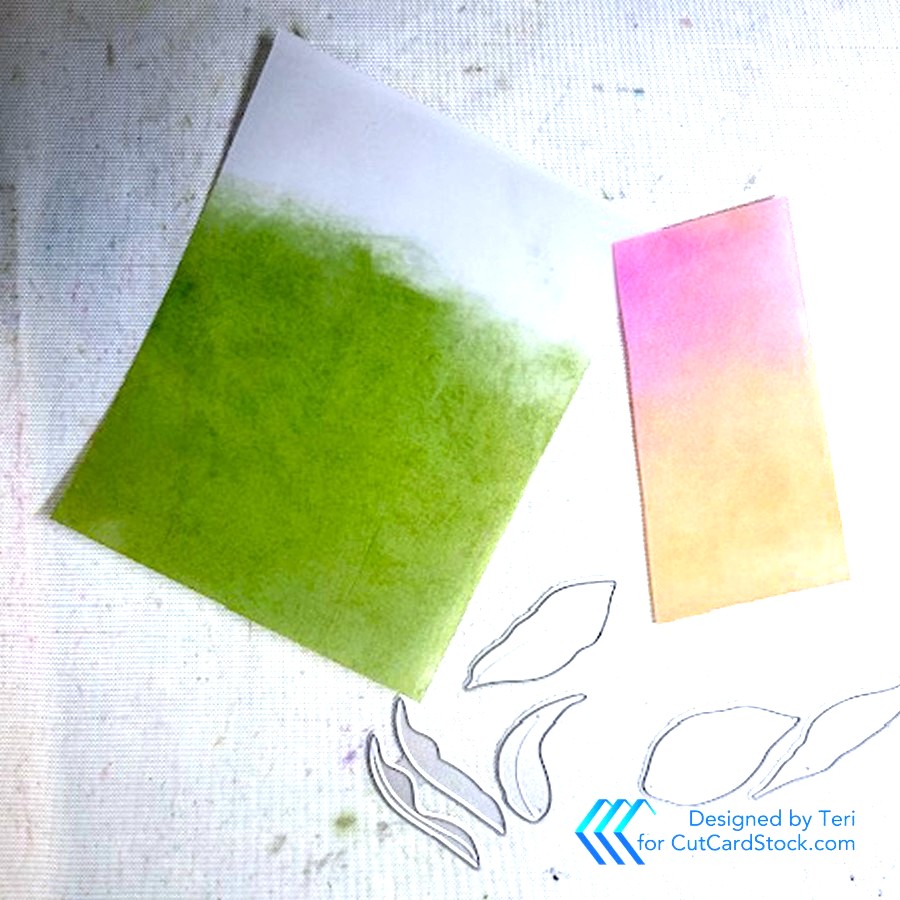
Assemble the bloom using the least amount of glue possible and concentrating the glue near the center where it may be more hidden by the layers.
Create the Frame and Cut the Sentiment
Use the Bright Foil 10 pt. Cardstock plus the Embossing folder plus Die from Altenew's Frozen Moment Set to create the gorgeous, detailed rectangle frame. I layered three frames for dimension. Cut and layer two grateful sentiments for Concord and Ninth using the same gold cardstock. (I did alter the sentiment by cutting off the word so leaving only grateful).
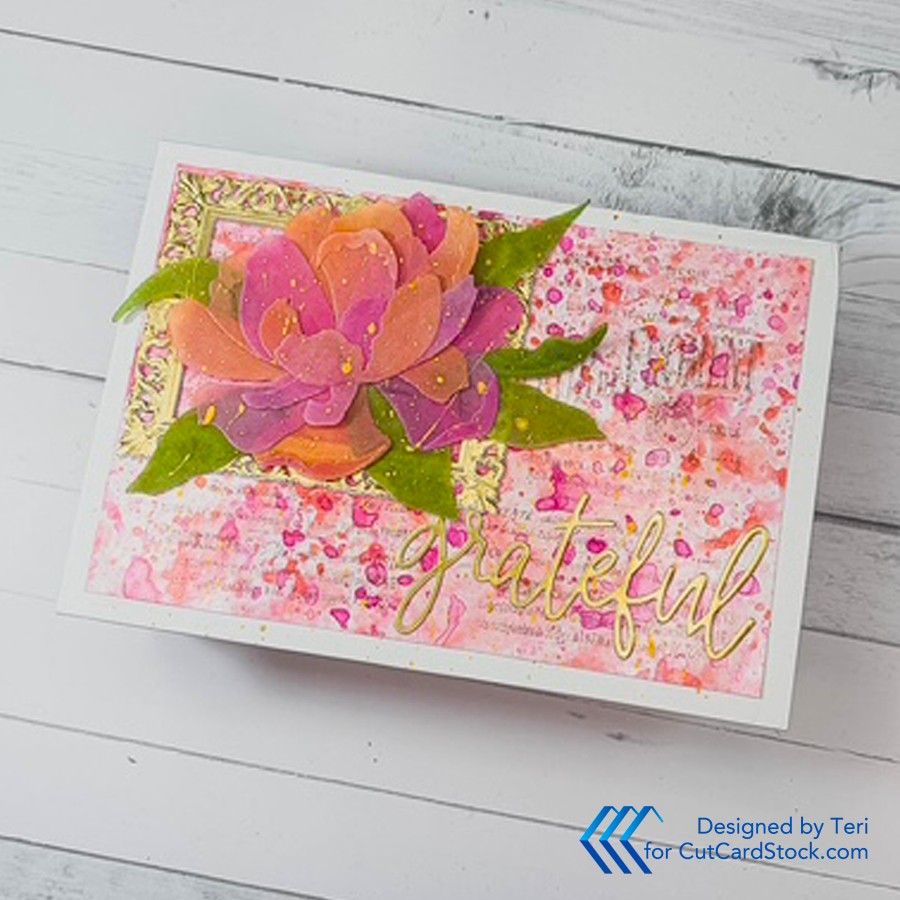
Assemble the Box
Arrange the bloom and leaves on the gold frame. Attach the gold from in the upper right corner allowing space for the sentiment in the lower left corner. Use a glue dot to attach the bloom in the center.
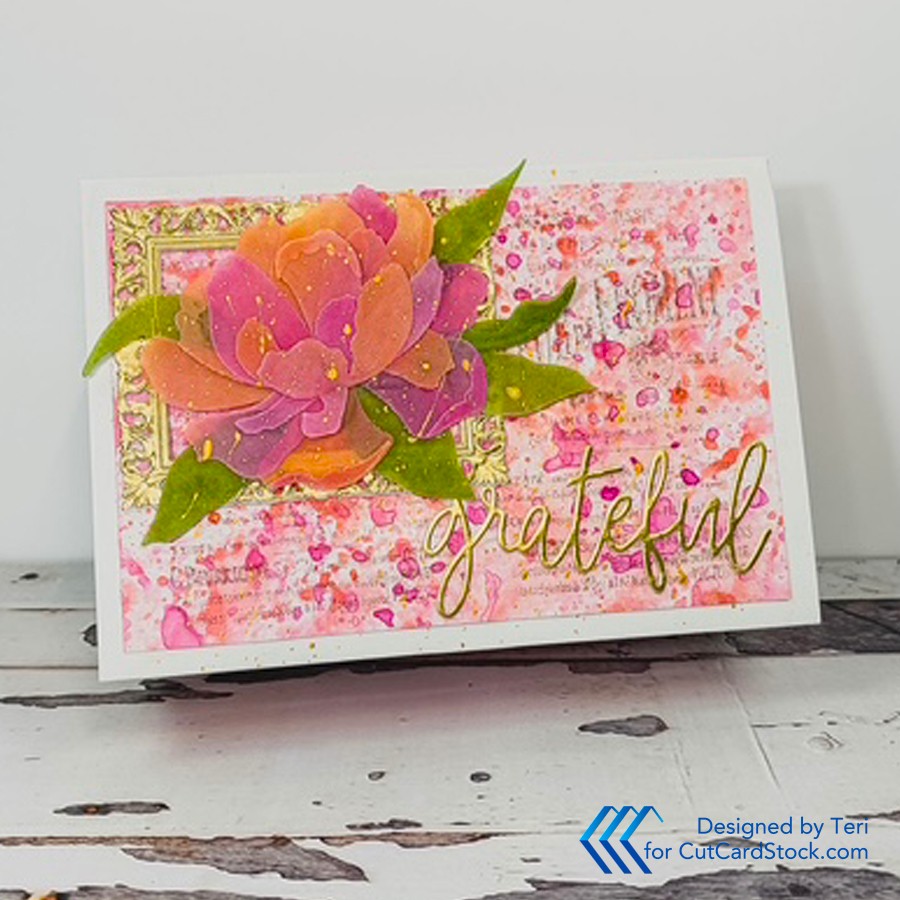
Before attaching the sentiment, splatter the top with gold paint. Attach the sentiment in the lower right corner!
Thanks for stopping by. I encourage you to try different surfaces with your inks! It is amazing the colors and techniques I have discovered simply by playing! Be sure to stop by CutCardStock and check out all the interesting colors and cardstocks they carry!


No comments:
Post a Comment