
Easter is fast approaching. Have you finished your cards? Hello, it is Teri with TerisMailbox posting for CutCardStock. Today I have this very cute bunny and a floral basket to share.

Create the Basket of Easter Blooms
Create your own blooming easter basket using a variety of floral die cuts! I am a fan of Tim Holtz and therefore have a selection of dies he created! I chose a few die sets to use for this beautiful basket. Cardstock choices are so easy as CutCardStock has a large variety of gorgeous cardstocks. I used DCS Light Teal, Hummingbird, Basis Light Yellow, Pop-tone Grapesicle, Pink Tutu, Pastel Pink and Lessebo Sunset to die cut multiple flowers. Lessebo Moss Cardstock is perfect for the leaves. Pop-tone Hot Fudge is a great chocolate Easter Bunny color. The basket is created using DCS Twine Cardstock (the die was swiped with Brown Archival Ink prior to die cutting)!

Emboss the Card Base
I love adding texture to my card bases with embossing folders. Even white embossed bases can add so much to a card! I cut a card base of 4.25 x 5.5 inches using 80 lb. Cougar White Cardstock. I ran it through my die cut machine once and the texture just pops!
Assemble the Easter Blooms
The next step is to spread out all the blooms and leaves and assemble them. Many of the blooms have two, maybe three layers. Spread od the bloom and leaves on your work surface. Use the wicker basket as your base. Begin by adding the taller flowers first to create the base. Glue some smalle r blooms near the top and work your way down until the basket is full!
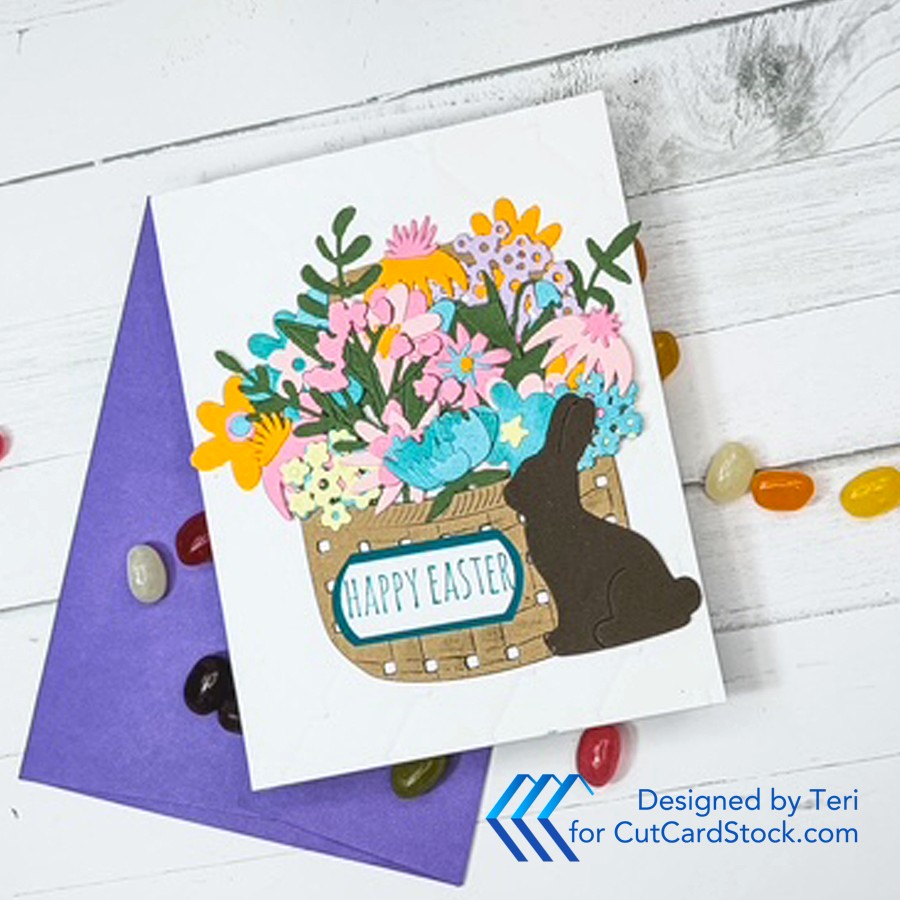
Assemble the Card
Use 110 lb. White Cougar Cardstock for the base. This is my go-to cardstock for bases as it provides a strong base upon which to build your card. Attach the embossed panel next, followed by the bloom basket. You may want to top with an acrylic block to help the adhesion. Add a chocolate bunny. Stamp a sentiment and attach where you like.


No comments:
Post a Comment