
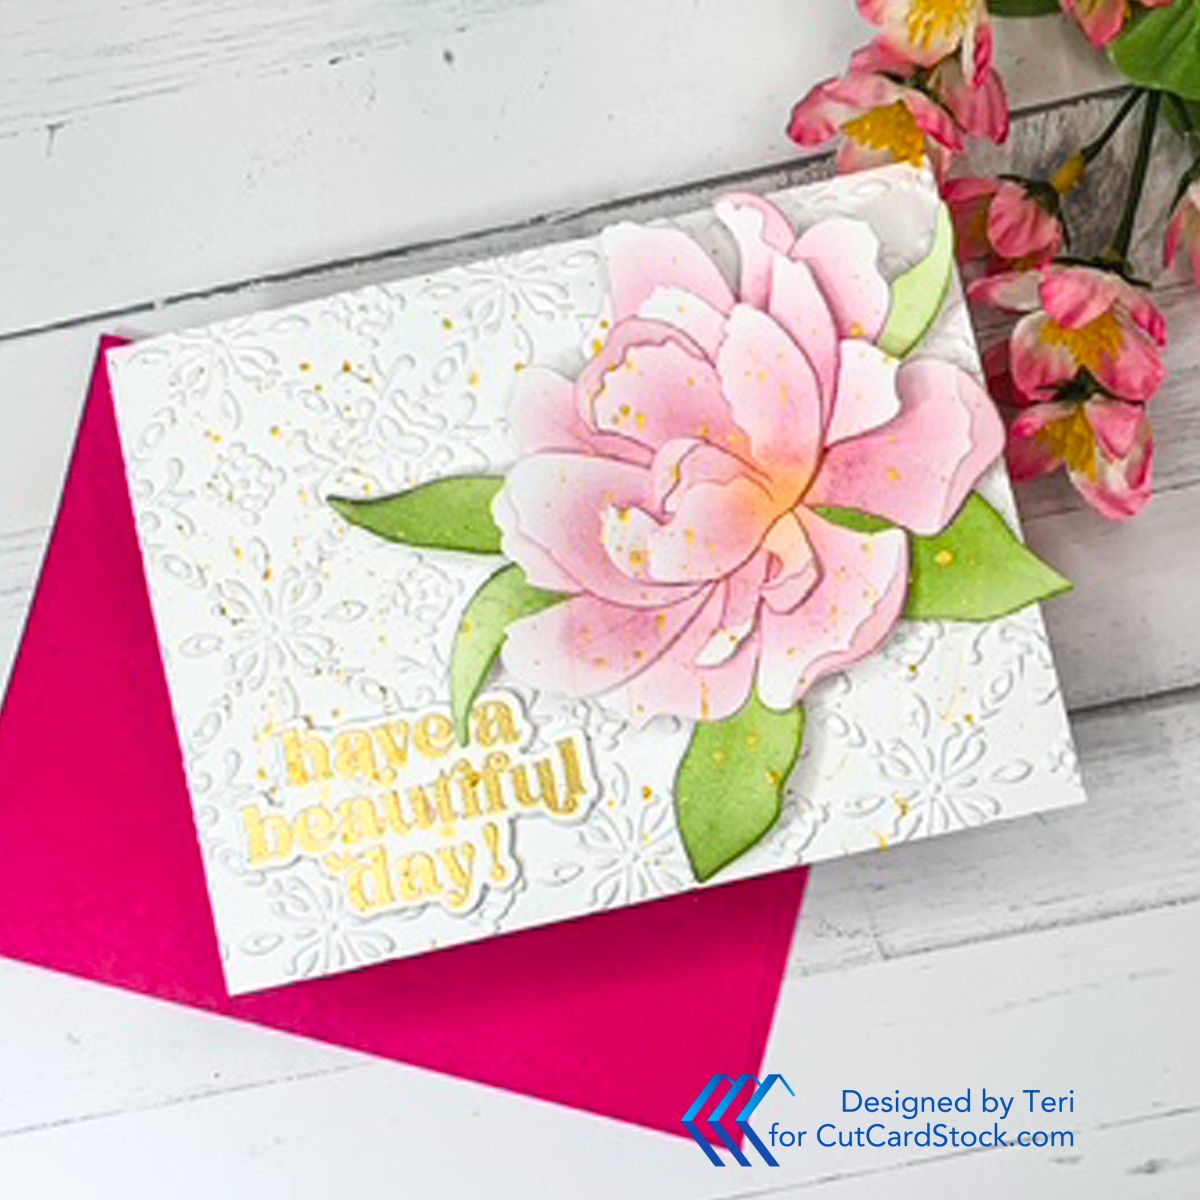
Have you ever added dimension to your flat flowers? See how I made dimensional blooms with Cougar Cardstock and die cuts to really help the blooms pop! Today I am posting for posting for CutCardstock!
Create the Center Dimensional Bloom
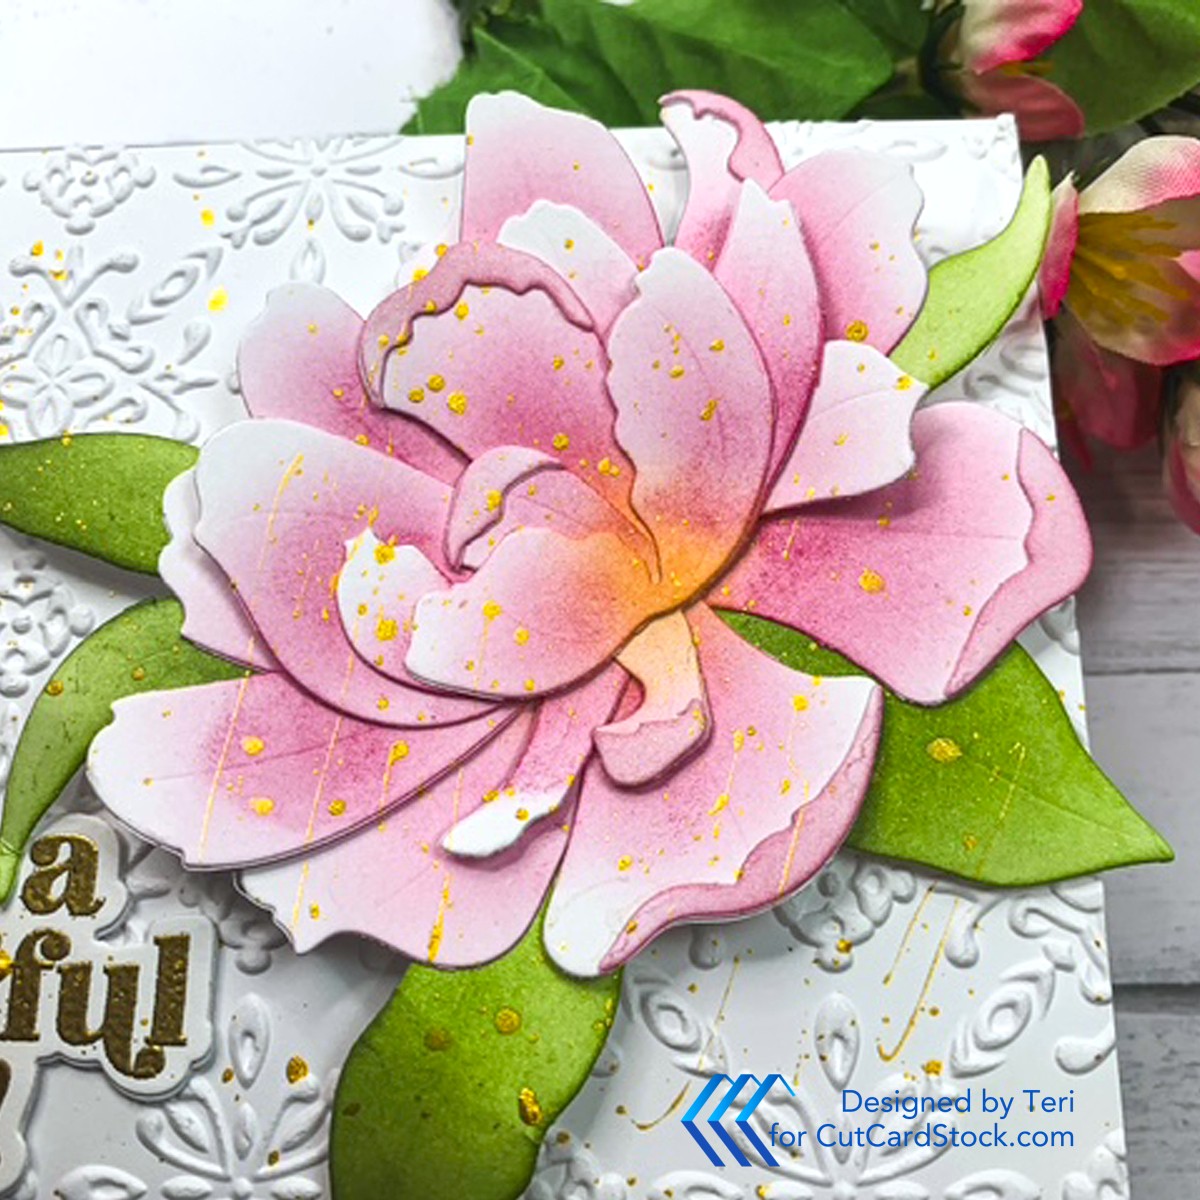
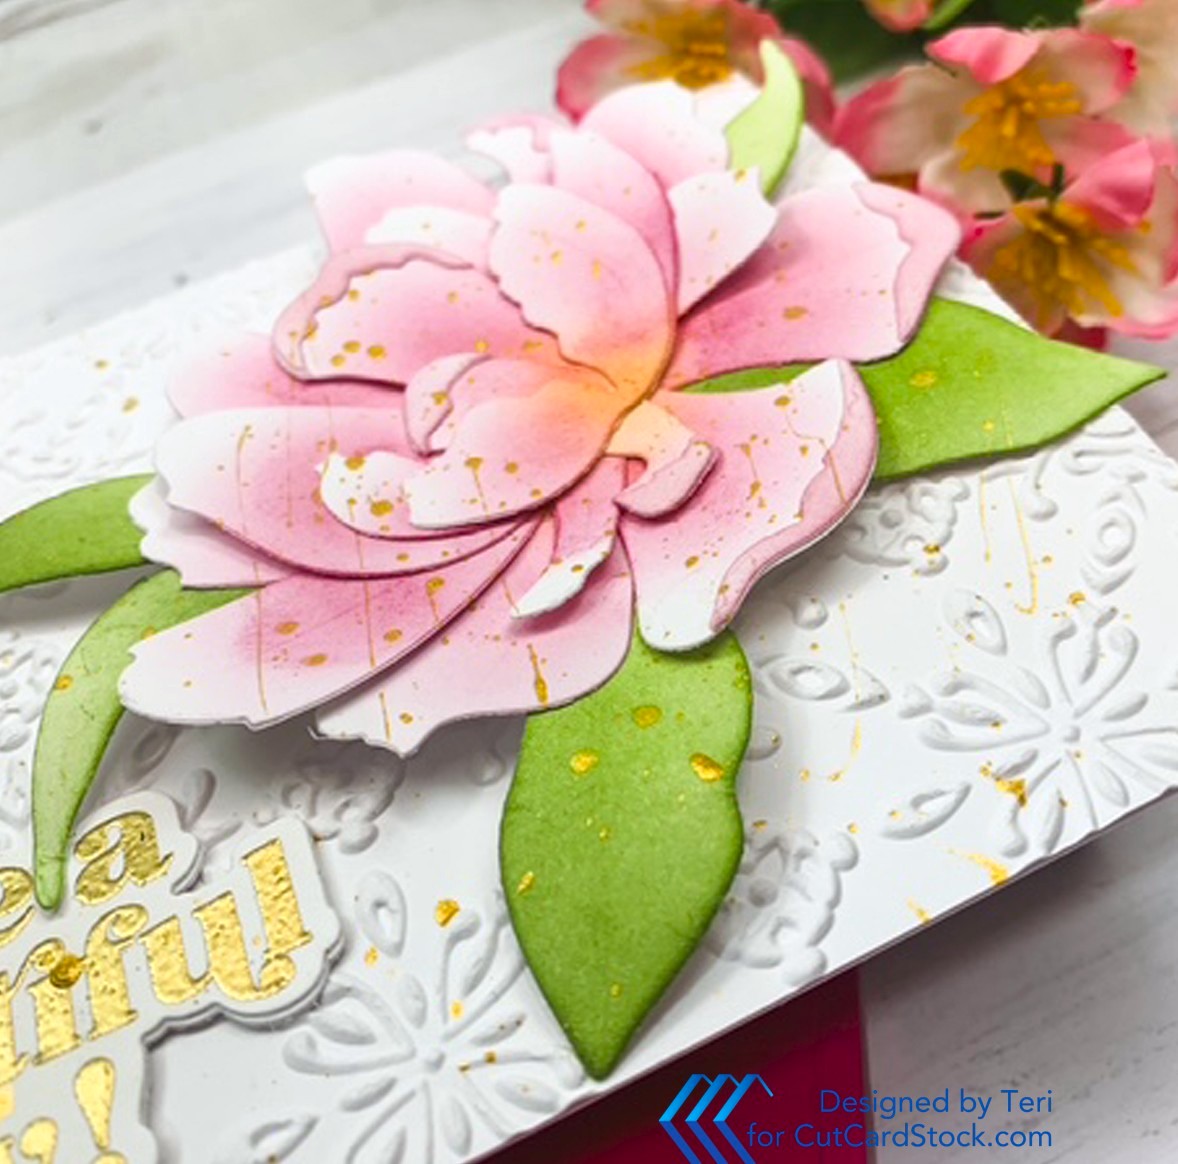
Can you believe this gorgeous bloom started as a flat piece of cardstock? I used by die cutting all the bloom and leaf pieces from White Cougar 80 lb. Cardstock. This is the Pink Star Tulip Set by Altenew. Arrange on a grip mat and use blending tools and ink to add color and depth.

I love to use multiple shades to achieve multicolor blooms. Use a round shaping tool seen in the photo below to add dimension by drawing light circles on the petals with the large metal ball.
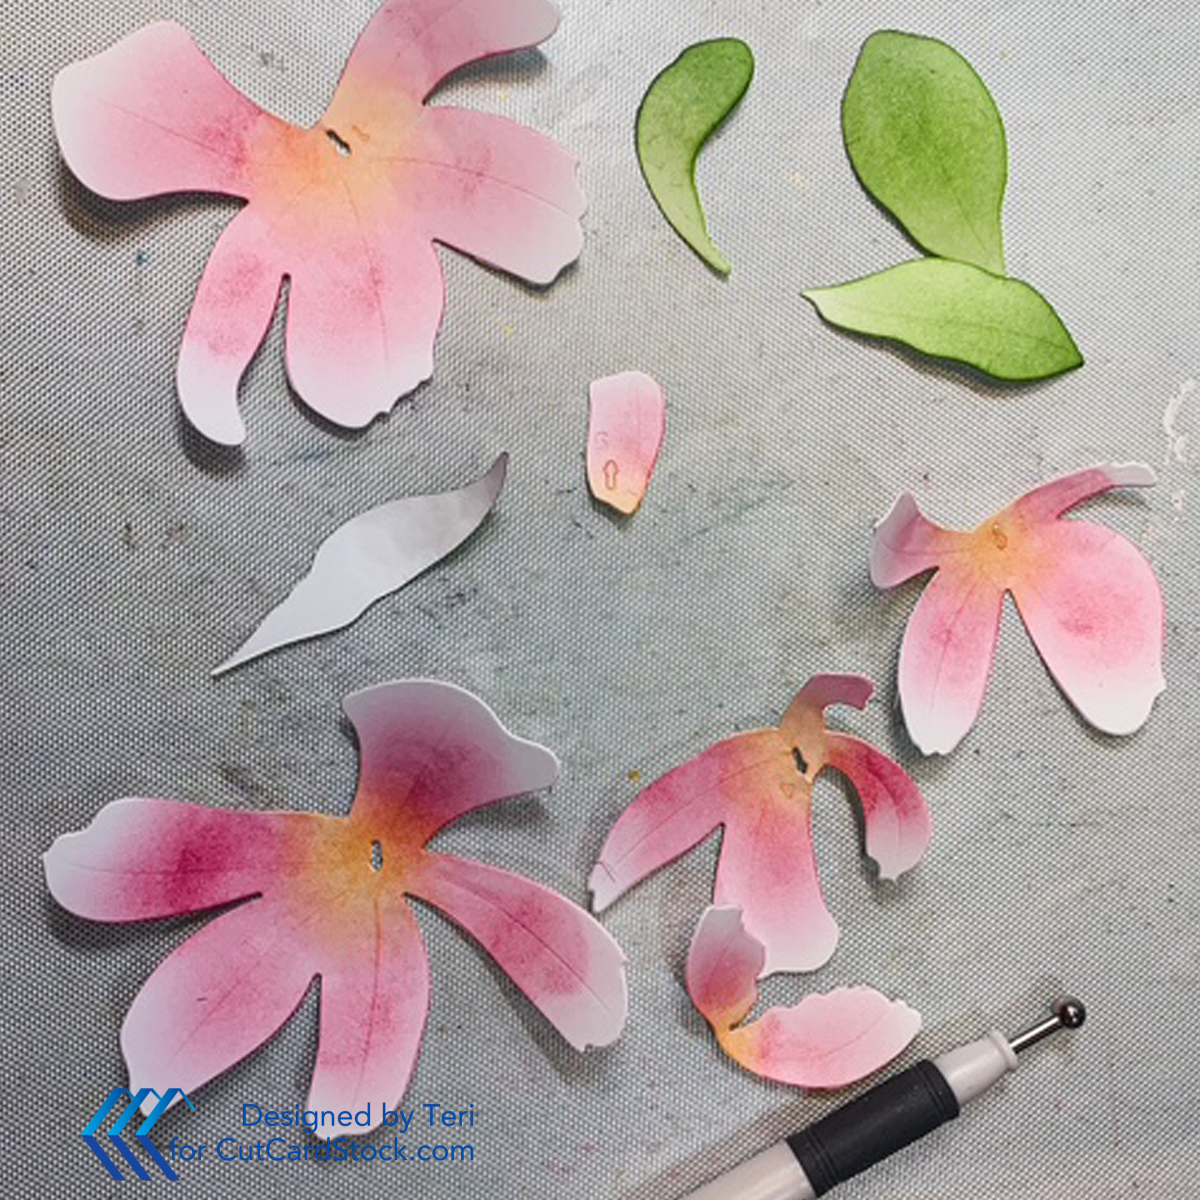
I love how the petals and leaves look like they are ready to jump off the page! Follow the directions and glue the pieces together to complete the flower.
Create the Card Panel
I am a huge fan of Embossing Folders. This is the Moroccan Tile folder by Altenew. Use any geometric embossing folder to emboss and A2 panel on Cougar 80 lb. White Cardstock. Check out how simply embossing a white panel adds so much interest!
Assemble the Card
Attach the embossed panel to an A2 card base made with 110 lb. Cougar White Cardstock. I like the heavier cardstock for my bases. CutCardStock can cut and score your bases! What a timesaver!
Glue the dimensional bloom on the base as well as a sentiment of your choice. I gold heat embossed my sentiment on Cougar Cardstock. Use gold acrylic paint to add splatters!

Thanks so much for stopping by. I hope you are inspired to try adding dimension to your blooms. Be sure to check out all the wonderful products at CutCardStock!


No comments:
Post a Comment