Altenew November 2022 Marvelous Monthly Series Release Blog Hop
Greetings friends. It's November and I am thrilled to be designing for the November Marvelous Monthly Release for Altenew! You should have arrived from Mindy Eggen's blog. The entire release party starts here. Don't forget to leave the designer's some love to be eligible to win a prize!
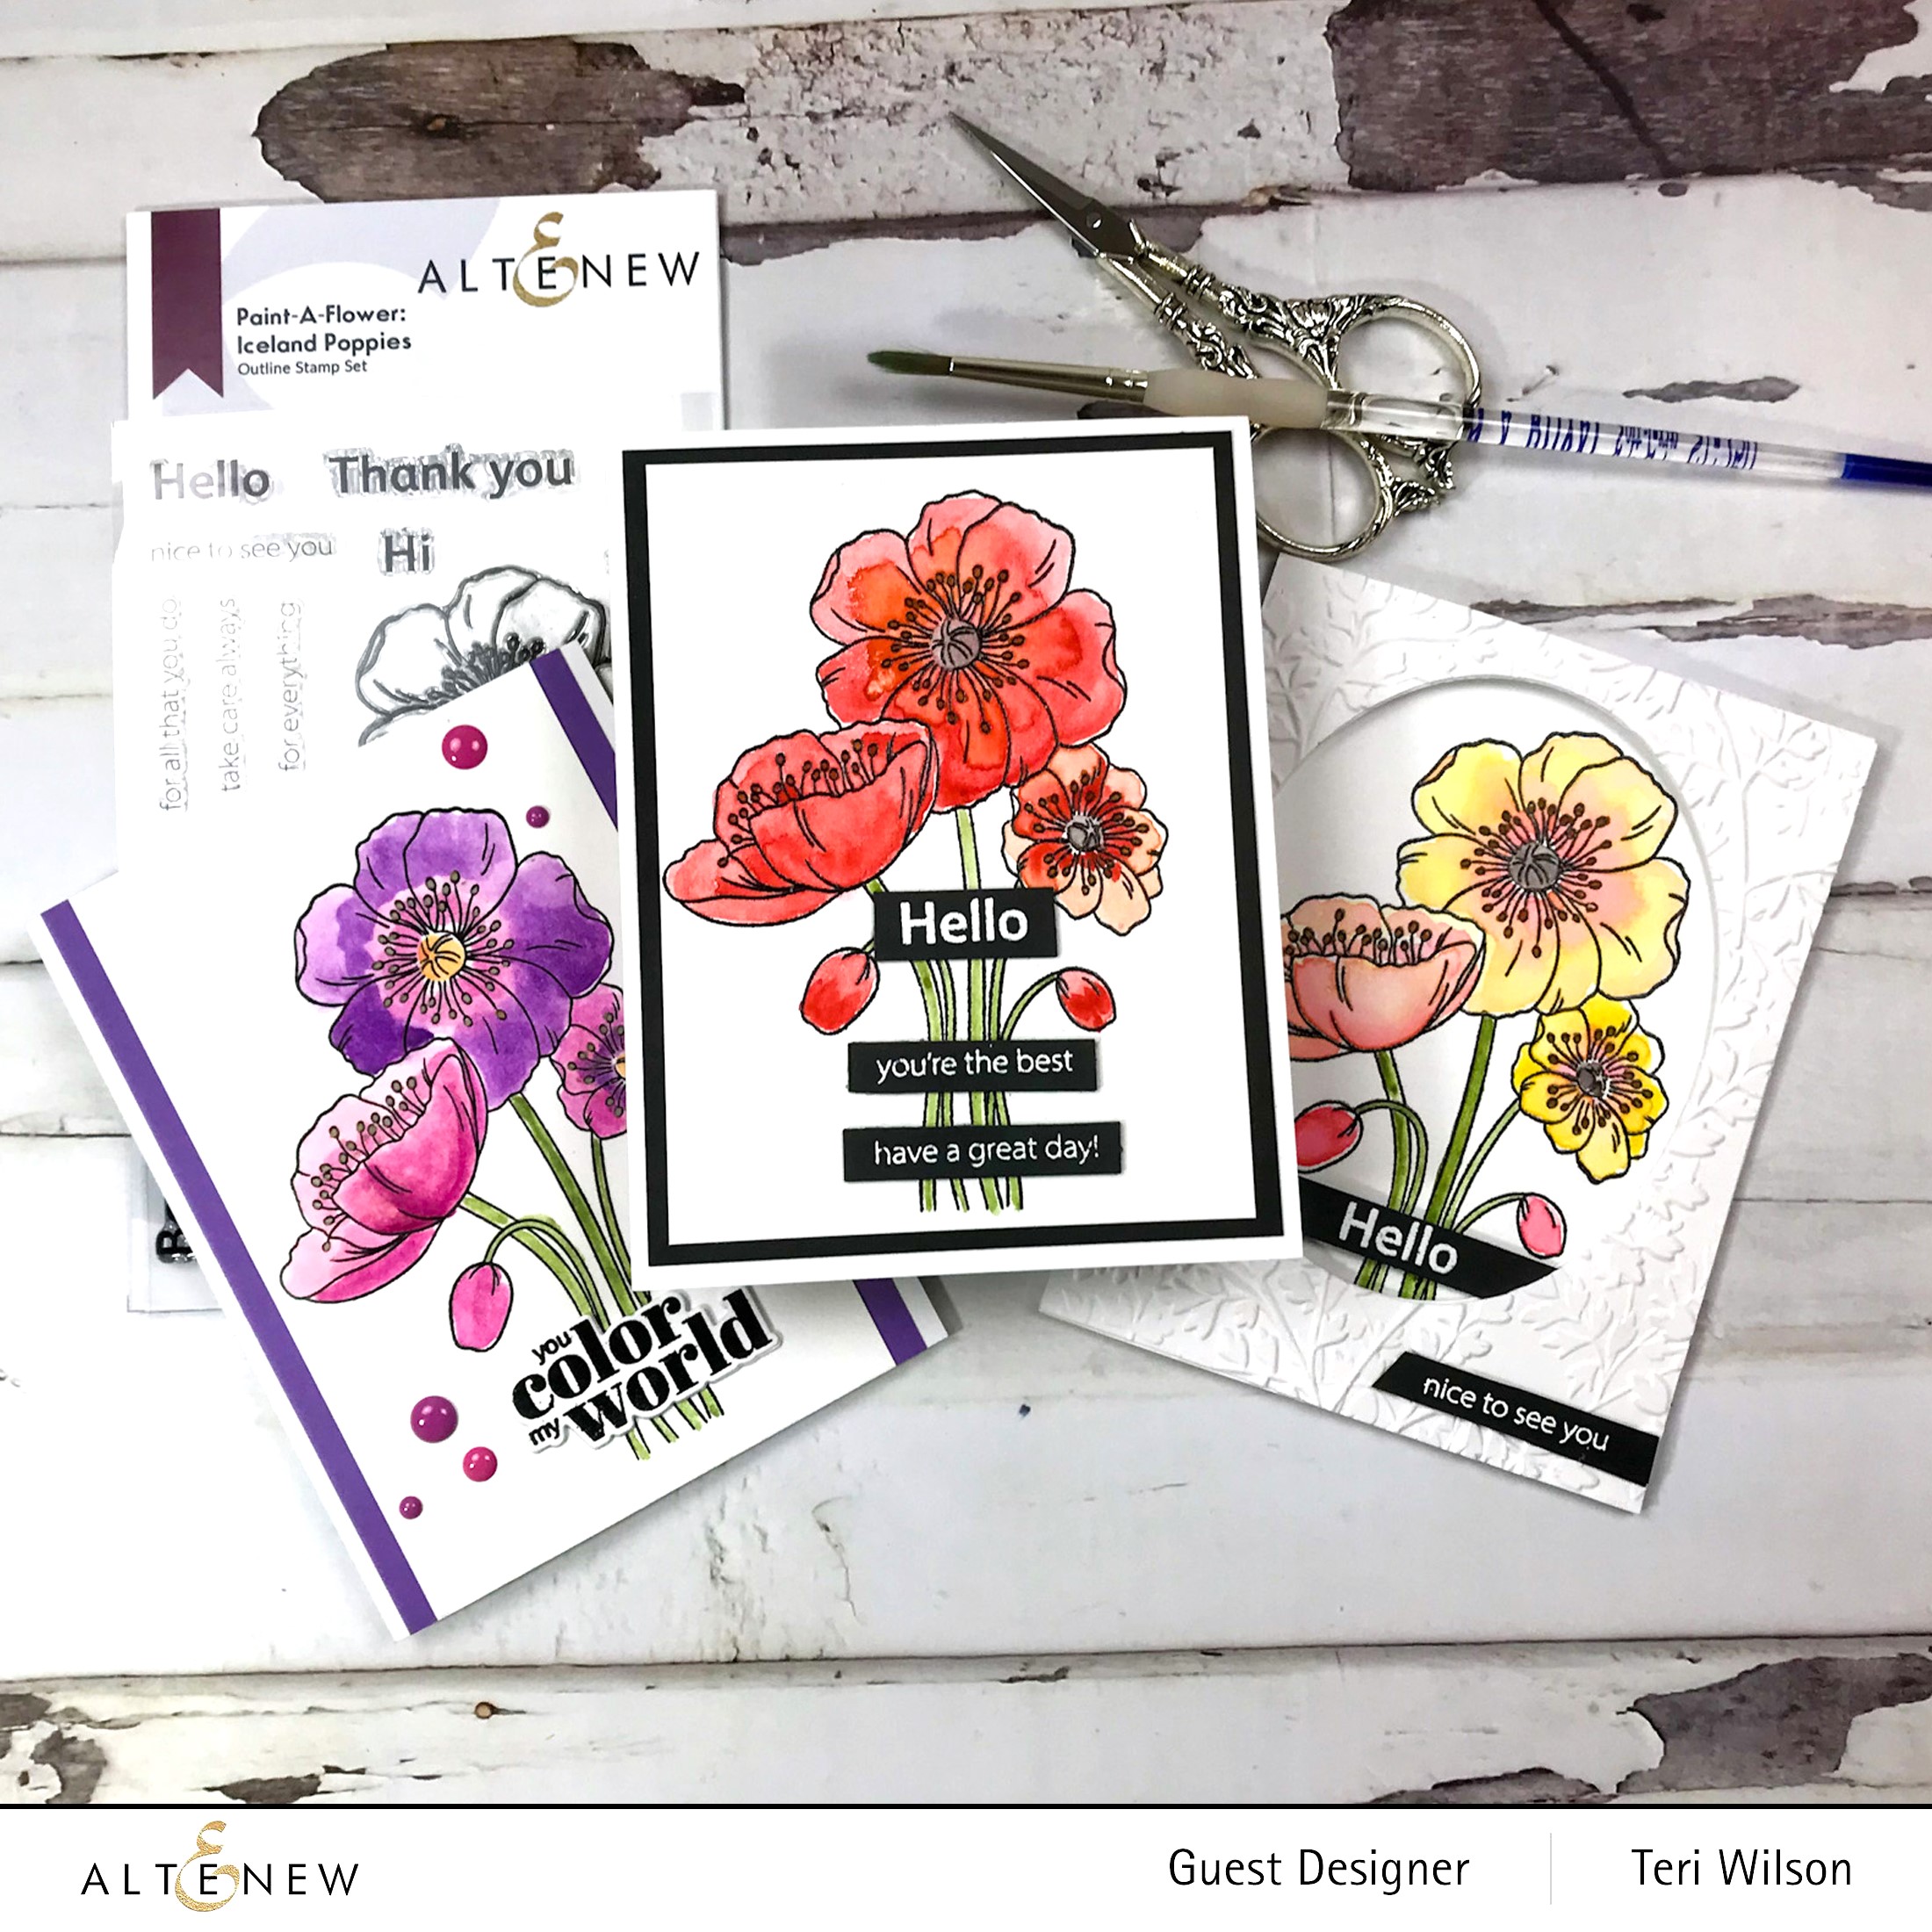
Check out all these lovely stamps, dies and stencils! I cannot choose a favorite! Release link is here!
I am loving all these project kits this month! Let's start with the Craft Your Life Project Kit Bewitching Rose! If you are looking for a complete set, this is it! The set includes stamps, stencils, dies and an embossing folder!
I used the kit to create two similar cards!
Check out the great background texture I achieved by layering two Leaf Cover Dies on a white cardbase!
This card started by stamping the floral blooms using Black Obsidian Pigment Ink (my favorite black ink). Once it dried, I used the coordinating stencils to ink blend the rose using Citrus Burst, Maple Yellow and Honey Drizzle inks from the Pocketful of Sunshine set. Check out the great layers you can achieve!
Olive and Moss inks from the Tropical Forest set colored the leaves, and Lavendar Fields was a perfect choice for the berries! Rouge and Coral Bliss from the Tea Party set added a warm pink glow to the flowers.
Once all the stenciling was complete, I used the die cut to cut the blooms and an additional layer.
After gluing the background and the blooms, I added a tag using one of the sentiments from the sets. The tag is edged with Citrus Burst ink to set it off.
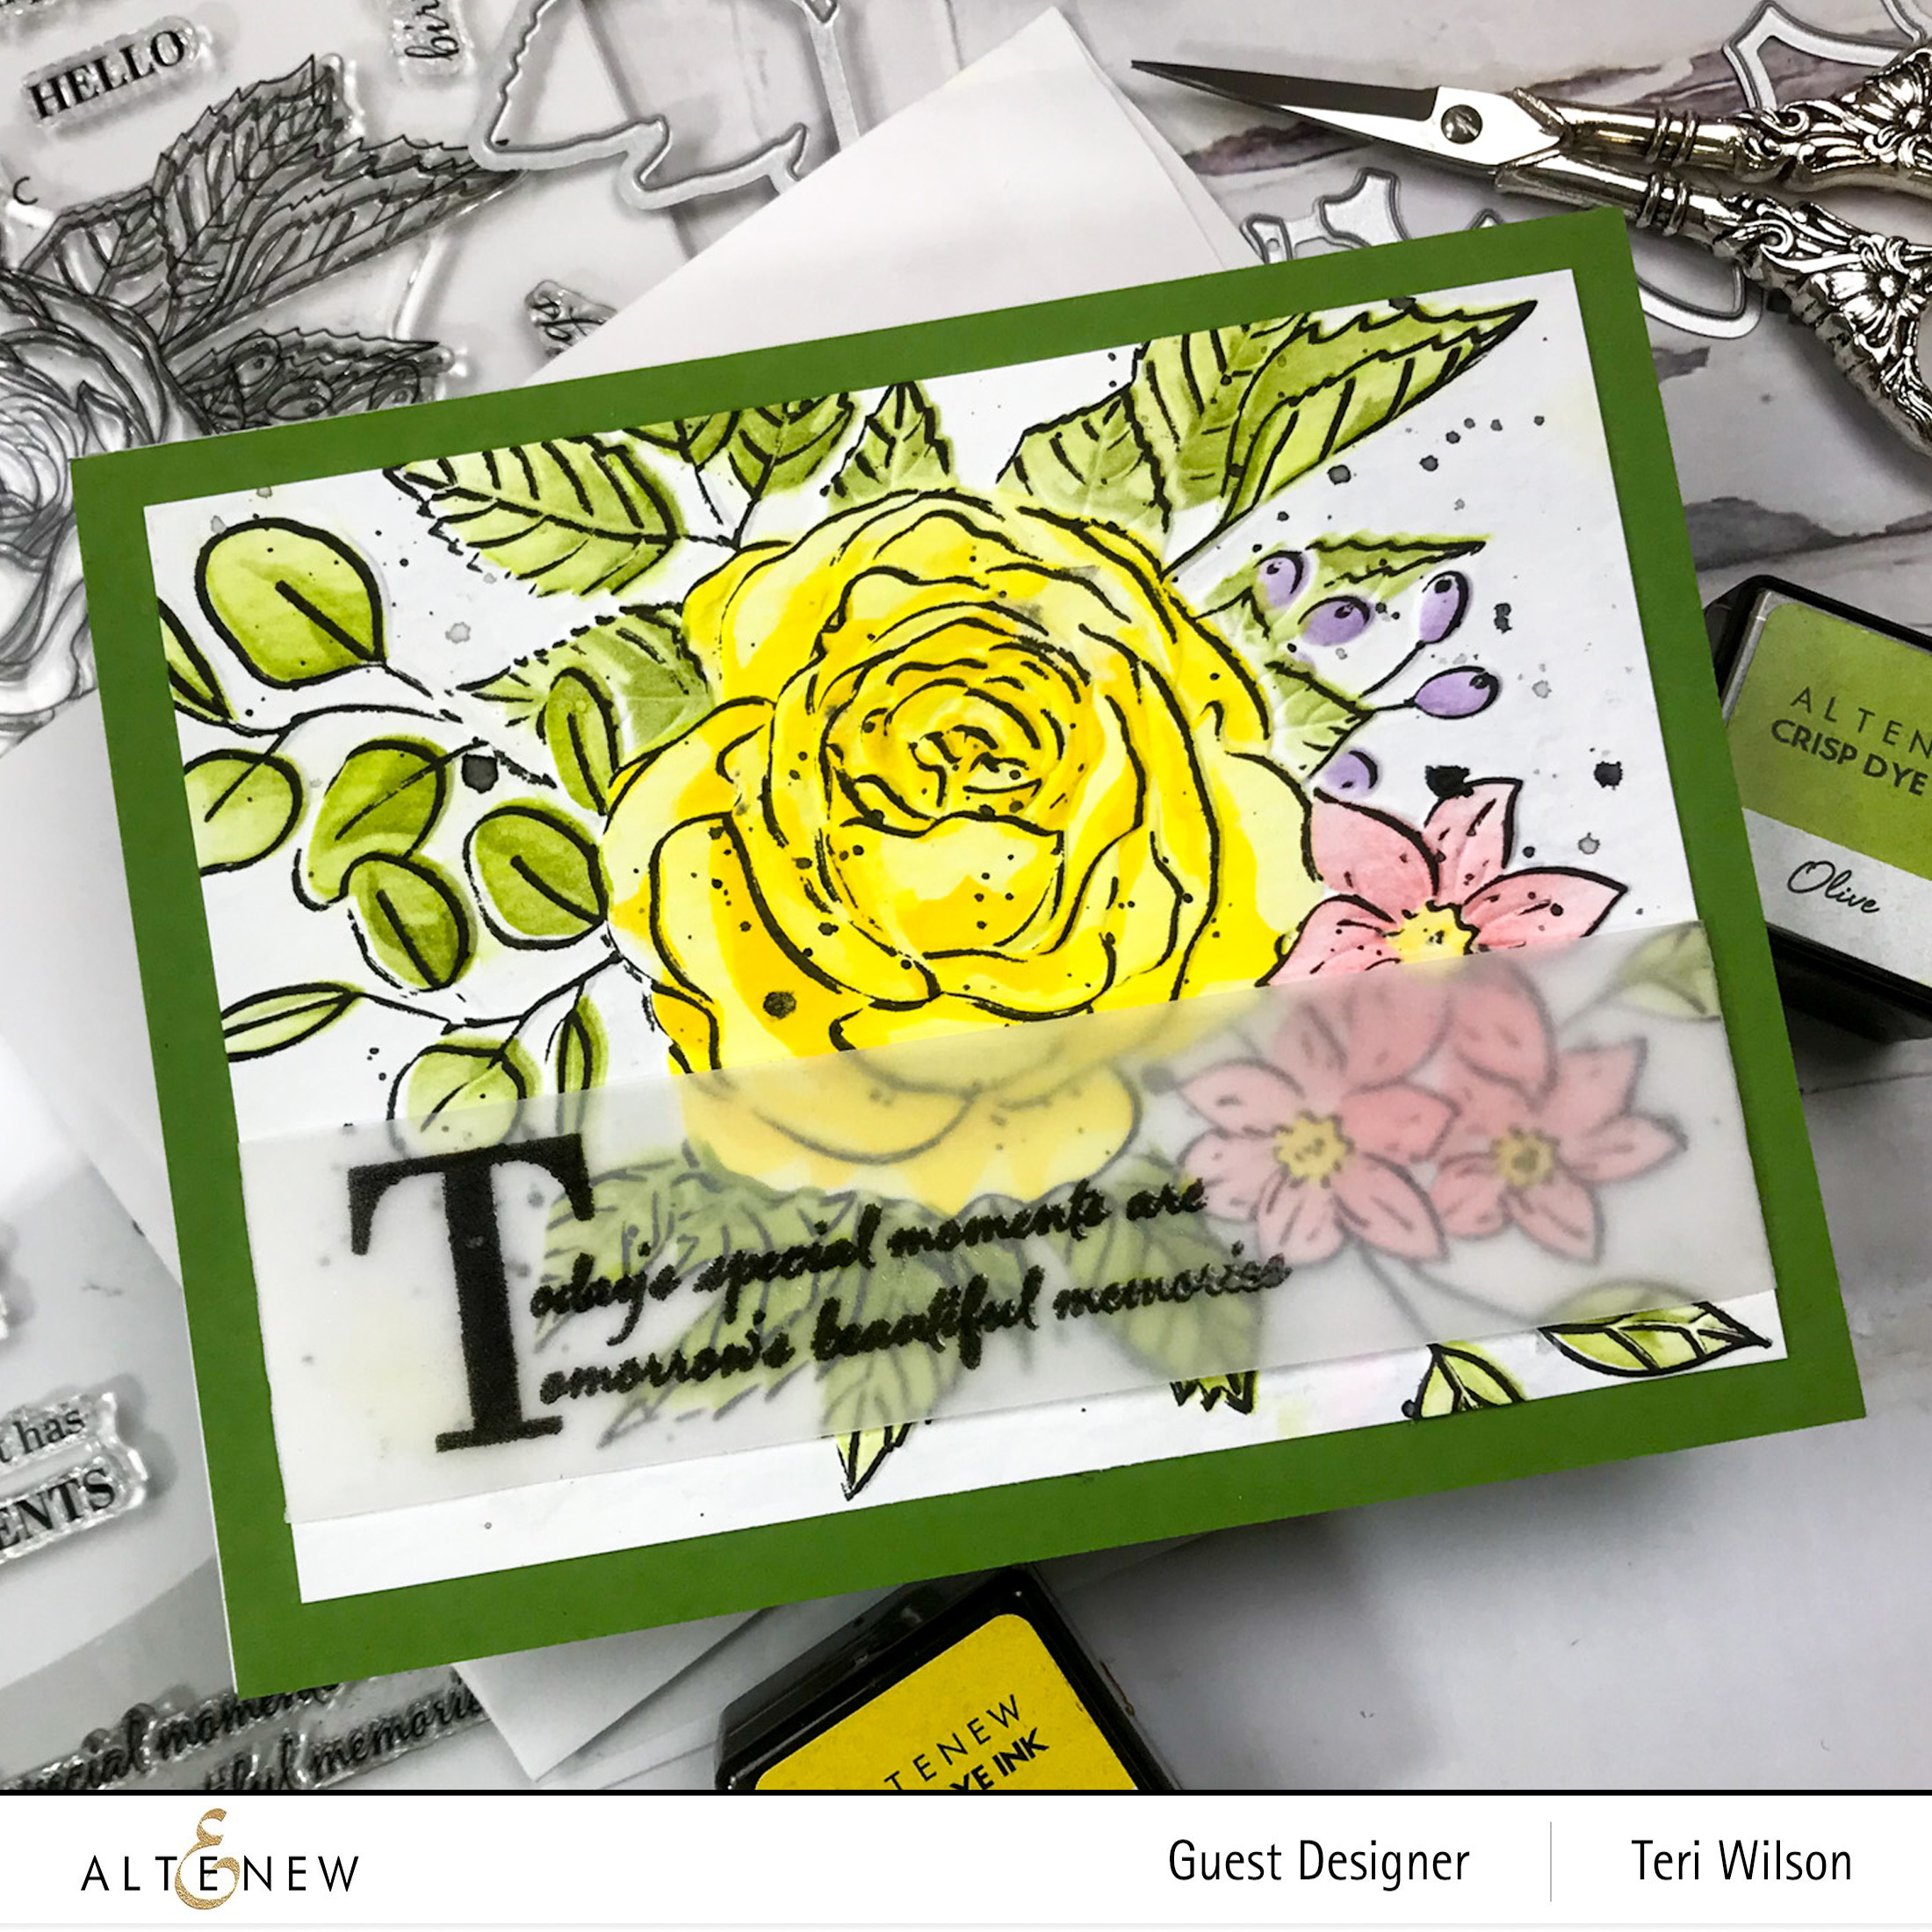
Now, let's look at a similar card, this time on watercolor paper.
Check out the additional texture created simply by stenciling and stamped on an embossed image!
I started by embossing the image with the Embossing Folder on Watercolor Cardstock. The blooms were colored using the stencils in the same colors as the card above.
After the stenciling was complete, I decided to stamp the outline with Black Obsidian Ink. I think it added some interest as it didn't stamp completely evenly. A few black Gesso splatters set off the image. I black heat embossed the sentiment on a vellum strip wrapped around the bloom base and added to a green base layer for the A2 card.
Check out the bright layers using this gorgeous die set! I have a video here in case you'd prefer to watch.
Here is the link in case it is not appearing: https://youtu.be/5egnqo_kNTM
This card uses floral blooms that have been ink blended. If you watch the video you will see that I started by lining up the dies on a piece of cardstock and another set on watercolor paper. Ink colors used for these blooms include Buttercream, Warm Sunshine, Chamomile, Olive, Moss, Baby Pink and Rubellite.
After inking, I assembled the flowers using the keyholes for direction.
The background was created by dry embossing a stitched oval in the center of an A2 card and coloring with the Deco Wallpaper Stencil. I added the flowers and Hugs from the Hello and Hugs Die set in bright pink sets off the finished card.
The second cards used the same die cut only water colored with the 36 Pan Watercolor Set on the watercolor paper die cuts. I love playing with watercolors as you can create your own color hues.
Check out the variation of color achieved on each of the blooms. The background is embossed using the Garden Harmony Embossing Folder. After embossing I added watercolors in the center and allowed them to drip down the panel. After it was dry, I attached to an A2 cardbase and glued the blooms and leaves on. The sentiment from the Essential Sentiments Strip Die set was cut using a coral cardstock, backed with a white strip.
I wanted the blooms to be mostly white like gardenias, so after black heat embossing the image twice, I used Buttercream ink to blend color in the center of the blooms with the stencils, and Green Fields to add light color to the leaves.
I wanted to just add texture with the rays stencil so I used Translucent paste through the stencil to achieve this look on Dark Navy cardstock. I attached the blooms and leaves to the Navy base with the Dimensional Foam Tape. I popped up the second blooms with foam layers for even more dimension.
The small Nested Slimline Label Die was perfect to use as the base for the Black Embossed Sentiment.
What a difference color themes can make in the overall appearance of the blooms.
I water colored all three cards using the 36 Pan Watercolor Set. So much variety in the colors. The images were first black heat embossed on 100 lb. Cardstock. I like to heat emboss my images when water coloring as it created a pan to hold the color. I used different layers of pinks and red to achieve the red color of the blooms. A little green watercolor for the stems and you are done coloring!
A black cardstock layer between the painted layer and a white A2 card rally picks up the outlines as well as the three sentiment tags I created by white heat embossing on black cardstock.
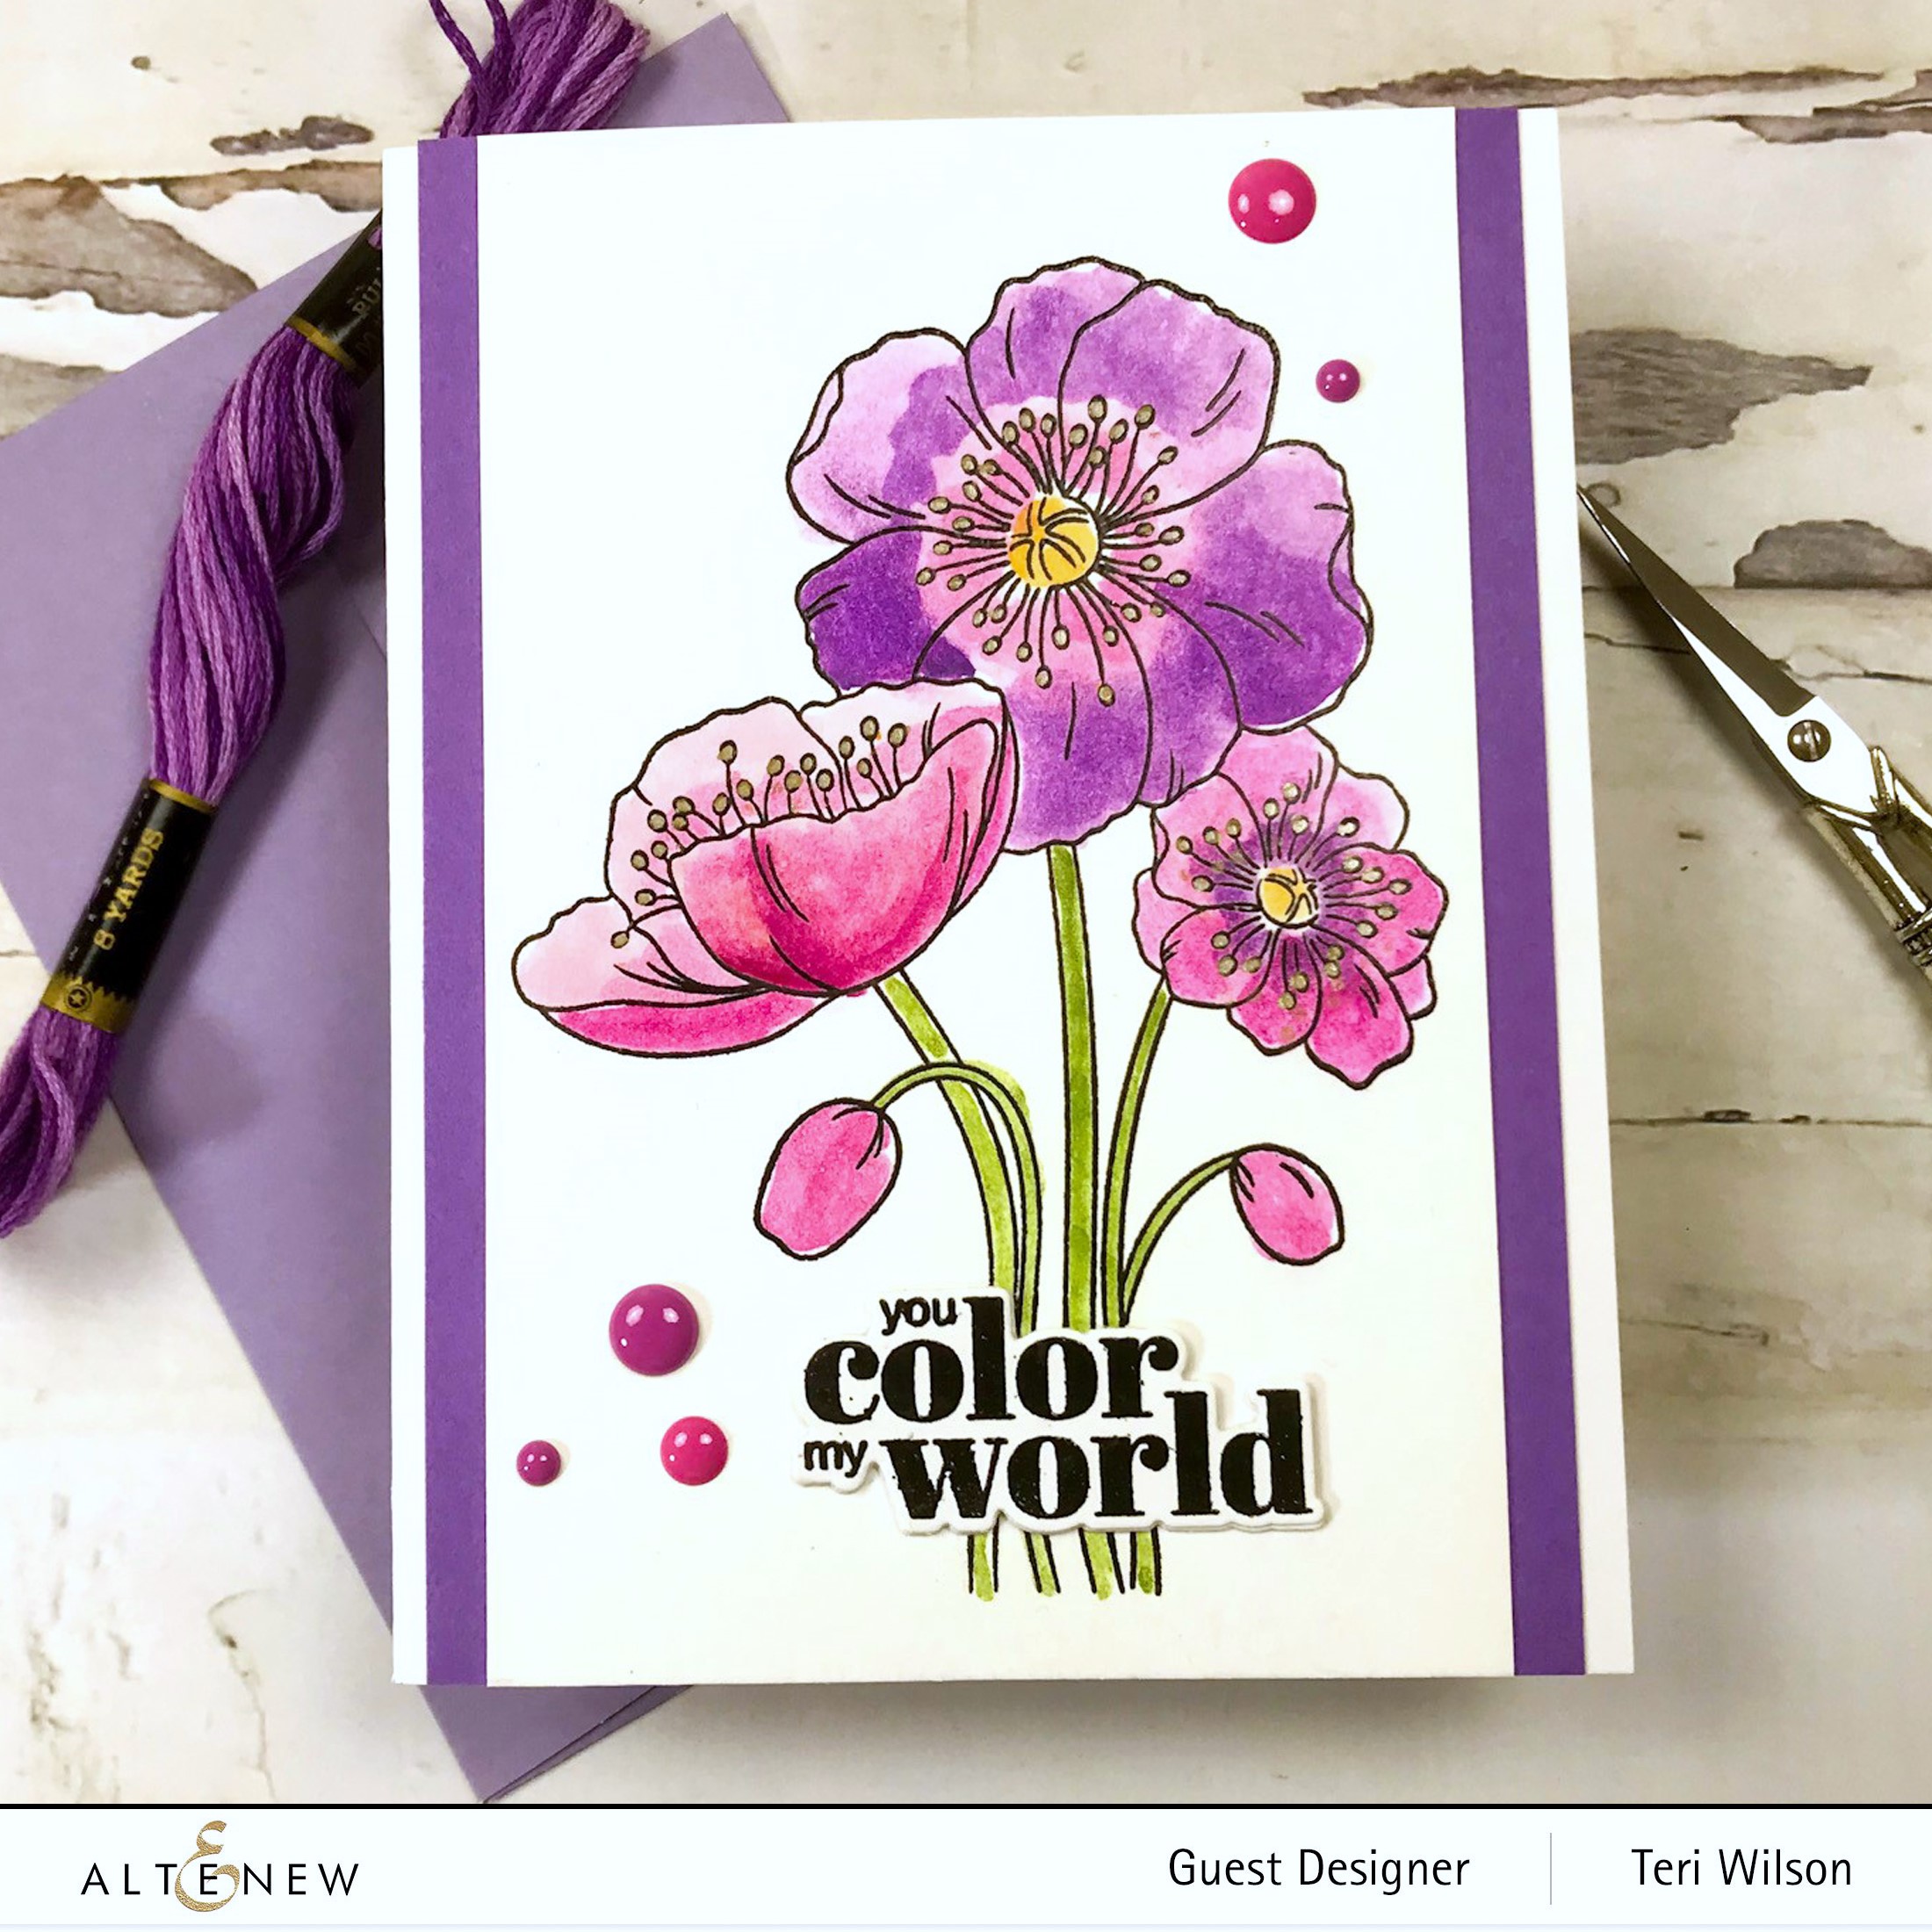
Next up is the purple and pink version of the card!
Check out these vibrant colors from the same Watercolor Pan set!
This time, I trimmed the floral panel to 3.25 inched by 5.5 inches and mounted the panel on a 3.75 x 5.5 inch purple panel to set it off. A few Altenew Enamel Dots add spots of color. The sentiment and die is from The Colorful Soul Set.
Last up is the oval window card.
Tones of yellow and pinks from the 36 Watercolor Pan Set add a unique look to this card. After the watercolor was dry, I started creating the base.
I used a large oval die to cut the opening in the front of the card base as well as an additional A2 size panel. I used the Garden Harmony Embossing Folder to emboss the panel. I white heat embossed Hello on a black cardstock strip and sandwiched between the card base and the embossed panel. An additional strip with a sentiment was also white heat embossed on black cardstock and added to the panel front. The floral panel was trimmed slightly and attached to the card base.
I hope I've inspired you to check out this wonderful new release from Altenew.
Giveaway Prizes
$300 in total prizes! To celebrate this release, Altenew is giving away a $50 gift certificate to 2 lucky winners and a $25 gift certificate to 8 winners! Please leave a comment on the Altenew Card Blog and/or each designer’s blog post on the blog hop list below by November 20, 2022 for a chance to win.
Altenew will draw 10 random winners from the comments left on each stop of this blog hop and announce the winners on the Altenew Winners Page on November 21, 2022.
I am using compensated affiliate links meaning I earn a small
commission at no cost to you. I appreciate your support so I can bring you new
content.
Thanks so much for stopping by today! I'd
love to have you follow/subscribe on my social media sites Instagram, Facebook, Blogger and You Tube.
Be well. Be creative!
Your cards are so beautiful and inspirational. I love how you colored the flowers of each card and then created the wonderful backgrounds and oval frame. Perfect cards!
Hi Teri! All of your cards look incredible! I especially love your color choices for the cosmos set!! I can't wait to check out your video! Thank you for the hop!


.jpg)


.jpg)


These are stunning! I LOVE your color combos and gorgeous layers!
ReplyDeleteThanks Meg!
DeleteSuch great cards! I love these sets!
ReplyDeleteThanks Kathy
DeleteIts amazing what a color changeup can do! I love the poppies most of all.
ReplyDeleteThanks for commenting. The poppies are great and so versatile!
DeleteYour cards are so beautiful and inspirational. I love how you colored the flowers of each card and then created the wonderful backgrounds and oval frame. Perfect cards!
ReplyDeleteThanks Dorothy!
DeleteLovely cards! Your coloring and details are beautiful!
ReplyDeleteThanks Denise
DeleteI loved the way you colored the petals on the Craft a Flower instead of using colored cardstock. Gorgeous flowers!!!!!
ReplyDeleteThanks, I wanted multiple colors on different petals!
DeleteBeautiful!! I love those roses!
ReplyDeleteThanks. The rose set is great!
DeleteThese are all so pretty!! Thank you for sharing
ReplyDeleteThanks Melissa
DeleteVery beautiful cards!
ReplyDeleteThanks Linda
DeleteBeautiful blossom cards! I'm am amazed at how real the flower dies look without stamping!
ReplyDeleteThanks Geri.
DeleteThank you Veronica
ReplyDeleteI really couldn't pick a favorite the=is time. Thanks for stopping by.
ReplyDeleteBeautiful cards and florals. I especially love the soft colors.
ReplyDeleteSuch beautiful cards! Love the flowers and the colors.
ReplyDeleteThanks for sharing.
Wow! These are beautiful.
ReplyDeleteBeautiful job on all of your cards. Thank you for the video . Your blending is so pretty and soft . tyfs :)
ReplyDeleteThe green, yellow and pink scheme is very pretty. I like how soft they are, too.
ReplyDeleteLove, love the cosmos cards. Great blending job.
ReplyDeleteAll of your cards are so beautiful! I love the way you colored the Sulfur Cosmos die cuts on your video!
ReplyDeleteIt's truly a Marvelous Release and you've highlighted so much! TFS your inspiration.
ReplyDeleteHi Teri! All of your cards look incredible! I especially love your color choices for the cosmos set!! I can't wait to check out your video! Thank you for the hop!
ReplyDeleteHi again Teri. You again have another beautiful card. I can't wait to see your next card. They look amazing!
ReplyDelete