
Greetings Friends. Today I am posting for Altenew in a hop highlighting their wonderful Sticky Essentials Adhesive Products! The entire hop starts HERE. You should have arrived from Berina Rajakumar's blog.
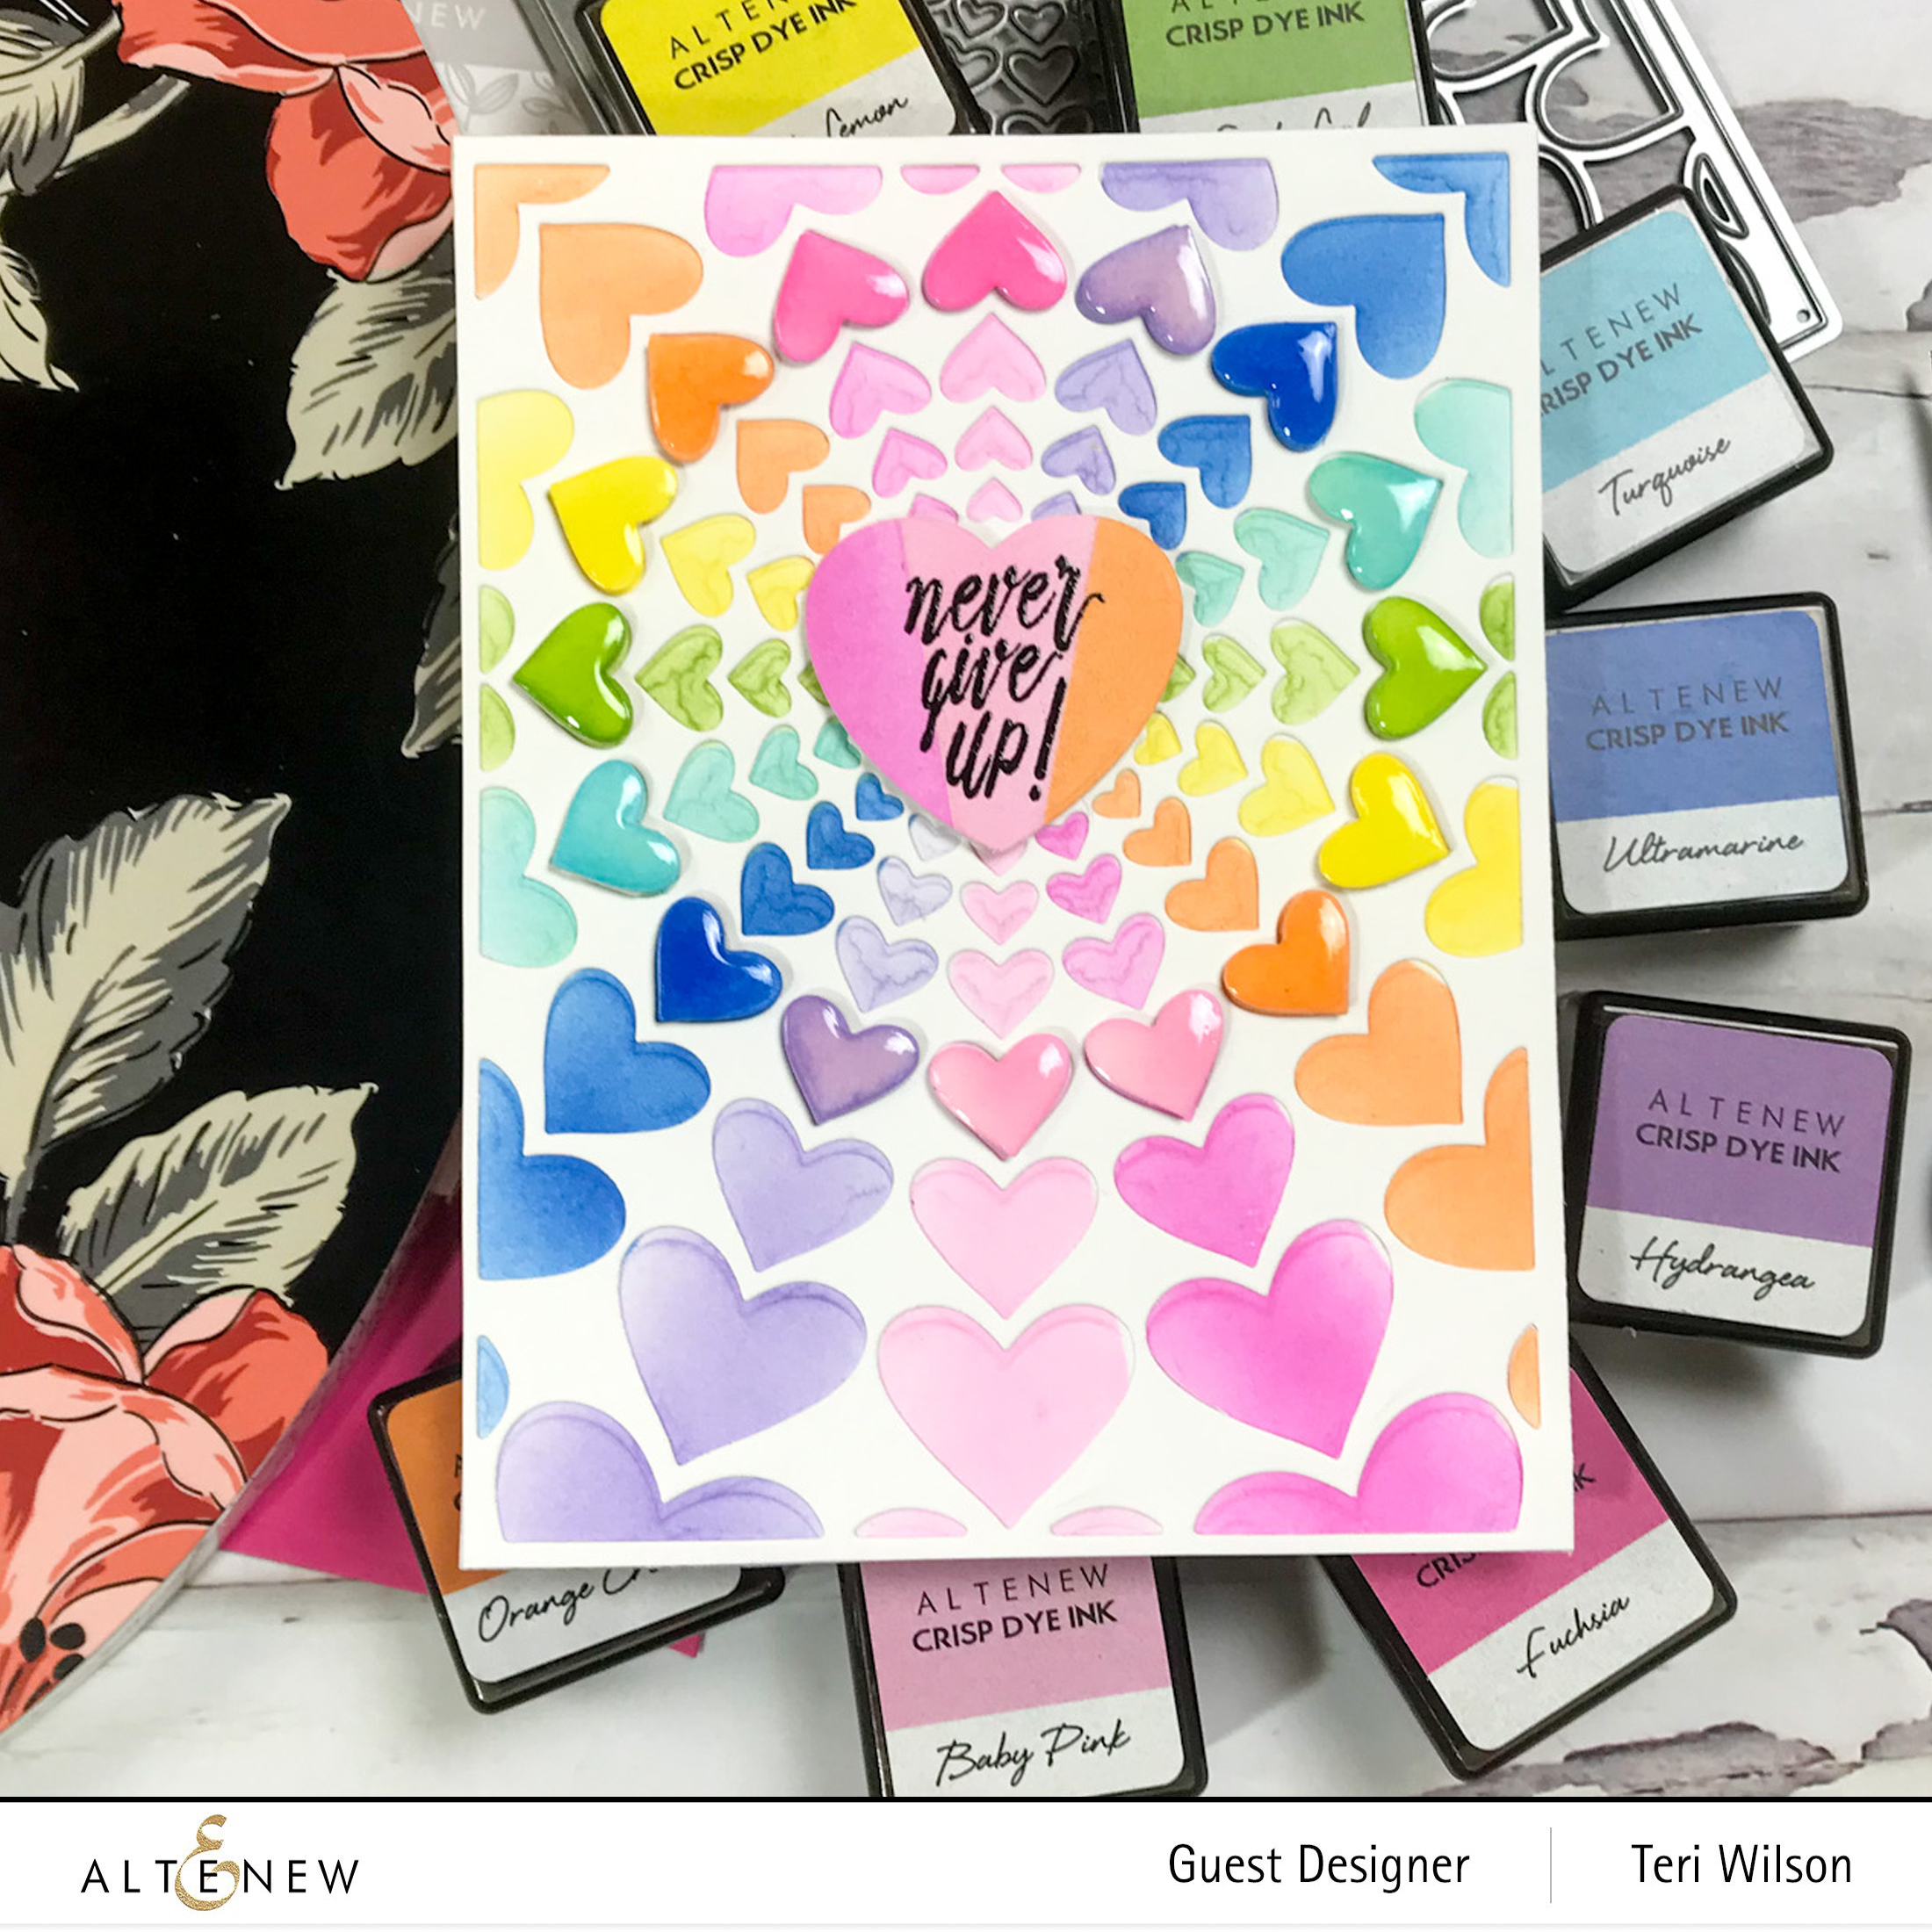


Continue around the card in rainbow order. There will be two lines of each color.

Arrange a set of hearts under each ink cube and ink blend to match.

Line the hearts in the coordinating line and use Instant Dimensional Foam Tape to pop the hearts up.

Giveaway Prizes
$300 in total prizes! To celebrate this special blog hop, Altenew is giving away a $50 gift certificate to 2 lucky winners and a $25 gift certificate to 8 winners! Please leave a comment on the Altenew Card Blog and/or each designer’s blog post on the blog hop list below by 10/05/2022 for a chance to win. Altenew will draw 10 random winners from the comments left on each stop of this blog hop and announce the winners on the Altenew Winners Page on 10/06/2022.
The next stop is: Reiko Tsuchida ***Note: Due to strict regulations in Japan, you might not be able to leave a comment on her blog post.
I am using compensated affiliate links meaning I earn a small
commission at no cost to you. I appreciate your support so I can bring you new
content.
Thanks so much for stopping by today! I'd
love to have you follow/subscribe on my social media sites Instagram, Facebook, Blogger and You Tube.
Be well. Be creative!


I love the depth in the heart.
ReplyDeleteGreat card!
ReplyDeleteBeautiful way to use the neg and pos pieces to make a pretty card.
ReplyDeleteWOW - love how you created this beautiful card - so beautiful
ReplyDeleteGreat card... love the rainbow and the dimensional hearts are perfect 🥰 💞
ReplyDeleteOh my gosh this card is stunning. The colors are amazing
ReplyDeleteThanks for the directions! Love your card!
ReplyDeleteReally Beautiful card!!!!
ReplyDeleteYour mask is genius.
ReplyDeleteLove the hearts. Thanks for sharing
ReplyDeleteAwesome card!
ReplyDeleteOh my, I love the techniques you used to make this card! The idea of the paper with the triangle cut out so you could do each row of hearts in separate colors is awesome. And I love the glaze on the hearts. Such a great touch!
ReplyDelete