
Hello Friends! I am posting today for The Funkie Junkie Boutique. The current Challenge is In the Middle. Check out their blog HERE for the deets and to enter. You may win a prize!

The flowers are sandwiched between the large label and the layered stenciled background.
Begin by choosing different stencils for the background. One will be used to add Texture Paste and Embossing Glaze.

Cut a piece of Heavyweight Distress Cardstock the exact size of the Mini Etcetera Tag to be the base.
Add a layer of color by ink smooshing with Speckled Egg, Old Paper, Antique Linen and Bundled Sage. These colors form a soft background, great to use stencils on top!
Ink blend with Bindled Sage using the Splotches stencil randomly on the tag. Follow by spritzing Weathered Wood Ink Spray with the Splashed Stencil. Heat dry before moving onto ink blending with the splashed stencil and Bundled Sage Distress ink.

The final tag layer is Crackle Texture Paste covered with Embossing Glaze (Peeled Paint, Speckled Egg and Wild Honey). I am reinforcing Tim's message to use your supplies here as my paste was somewhat dry and I lost some of the texture when I removed the stencil! Heat dry and set aside.
Create the label by stamping Peeled Paint on a piece of Heavyweight Cardstock torn into a rectangle. Use a stamp positioner so you can add additional texture by stamping on top of the sentiment with Archival Ink. I used one of the Mixed Media Stamps in the positioner to add texture by stamping the mixed media stamp onto the sentiment stamp and stamping again in the same place.

The next step is to work on the flowers. Cut a few larger stems from watercolor paper and color with Distress Inks and Distress Crayons. Colored used are Peeled Paint ink for the leaves and Fossilized Amer, Picked Raspberry and Spiced Marmalade for the Blooms.
The final step is to add Gilded Foundry Was to the flowers and label. Heat dry. Once all the components are done, assemble the tag using Collage Medium to glue the paper tag to the Etcetera Tag. Attach the floral bloom and add the label on top.


This is the original tag. I just felt like something was missing. Here is the final tag:
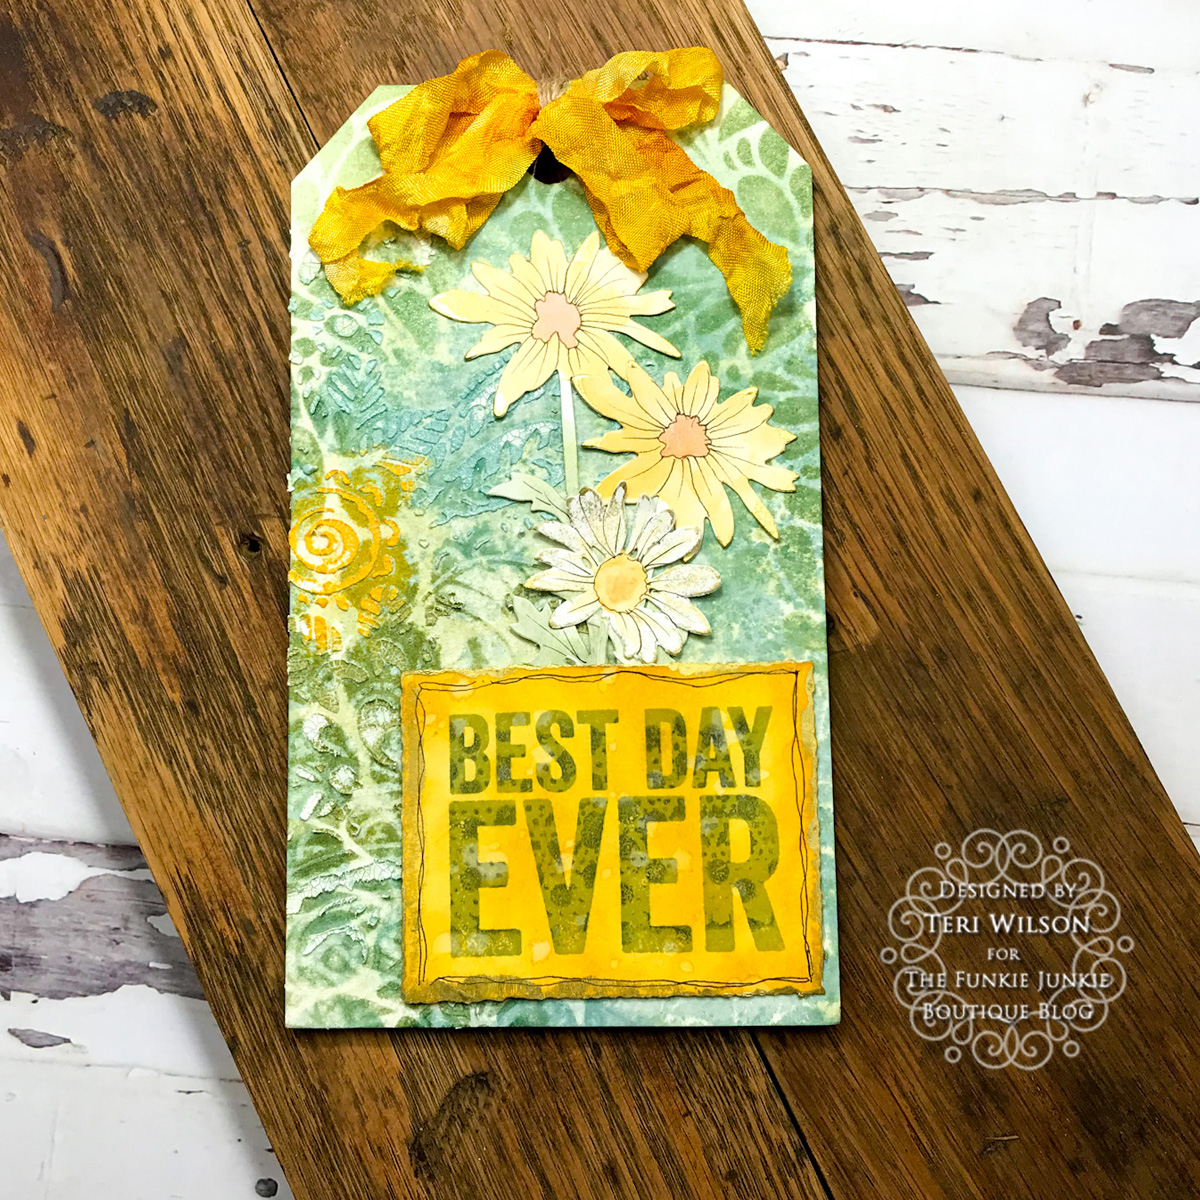
As you can see, I added texture and interest by adding lines on both the label and the flowers with a black Omron pen. I am happy with the detail that resulted from that simple step. What do you think?
Products Used (available products linked of your convenience);
Stampers Anonymous Mixed Media Stamp CMS 125
Fossilized Amber Distress Crayon
Crackle Texture Paste
Be sure to check out the amazing assortment of all things Tim as well as other great paper crafting lines at The Funkie Junkie Boutique
Thanks so much for stopping by today! I'd
love to have you follow/subscribe on my social media sites Instagram, Facebook, Blogger and You Tube.
Be well. Be creative!


Gorgeous tag! Love the colors and the beautiful flowers.
ReplyDelete