
Hello friends. Altenew Certified Educators are joining a fun blog hop and the theme is “𝐏𝐚𝐧𝐭𝐨𝐧𝐞 𝐂𝐨𝐥𝐨𝐫 𝟐𝟎𝟐𝟐 𝐚𝐧𝐝 𝐌𝐨𝐫𝐞” showing off periwinkle + one or more color projects! The hop starts from @altenewllc so make sure you start from the beginning!
Altenew is giving away a $20.00 gift certificate to 5 lucky winners! For a chance to win, please follow @altenewllc and @terismailbox and leave a comment by 3/24/2022.
Altenew will draw 5 random winners from the comments left on each stop of this Instagram hop and announce the winners on Altenew’s Educator Instagram hop post on 03/25//2022.


The background is an A2 base, ink blended with Soft Lilac Ink using the Square Weave Stencil. Once the blue pot was dry, I assembled the card and added the Hello from the Bold Greetings set cut with Black Glossy cardstock and layered on white die cuts slightly off center.

This os often how I begin working with multiple die cuts. I like to cut many out using different colors and sorting them in this bin which helps keep me organized!

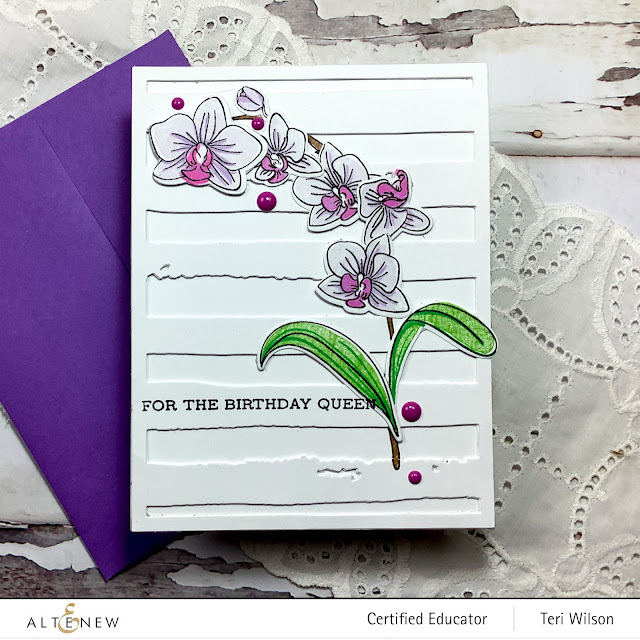
Next up is this sweet card with the textured background created using the Mod Squares Embossing Folder. The textured piece is smaller than the A2 card front to allow a border. The stem is stamped on the piece prior to embossing, and then the blooms and leaves applied after.


Another card with a textured base uses the Dotted Tie Debossing Die. This time, the blooms were stamped on Natual Cougar, so the base also needed to use the same cardstock. You can see the base is cut to 3.75 x 5 inches to allow another panel (5.25 x 4 inches) to be added.

As with the other cards, the stem is stamped first followed by the addition of the blooms and leaves. The so grateful is from the Essential Sentiments Die, cut in black and layered with purple cardstock.

After cutting the cardstock, the larger panel was ink blended with turquoise ink through the Grid Stencil to add color and interest. The large Nesting Slimline Label Die creates the perfect accent to the orchid flower.

So kind from the Inside and Out Thanks Stamp set heat embossed in black along with enamel dots complete this fun slimline card.
- Oriental Orchid Stamp and Die Bundle
- Mod Vases Die
- Watercolor Halftone Stamp
- Dotted Tile Debossing Cover Die
- Nesting Slimline Label Dies
- Bold Greetings Die
- Essential Sentiments
- Sentiment Strips 3
- Inside and Out Thanks Stamp
- Grid Stencil
- Square Weave Pattern Stencil
- Mod Square Embossing Folder
- Our Family Enamel Dots
- Black Obsidian Ink
- Enchanted Garden Mini Cubes
- Deep Blue Seas Mini Cubes
- Fuchsia Die Ink Pad
Thanks so much for stopping by today! I'd
love to have you follow/subscribe on my social media sites Instagram, Facebook, Blogger and You Tube.
Be well. Be creative!


I love every one of these beauties!! I especially love the slimline card but the different backgrounds make each one wonderful! Thanks for the awesome inspiration!
ReplyDelete