Hello Crafty Friends. I have more Ink Brayered Backgrounds for you! It is Teri with TerisMailbox posting for The Funkie Junkie. You may recall other posts where I created full page using Distress Oxide inks and a brayer. I am having too much fun using those backgrounds creatively. Today I am sharing three cards all using texture pastes with stencils.
Here are some of the original backgrounds created earlier.
Here is the first card I created. Start with a rainbow-colored base. Use THS 179 and a selection of distress inks to add even more color to the base. Distress Inks used include Carved Pumpkin, Picked Raspberry, Peacock Feathers, Twisted Citron, Wilted Violet and Mustard Seed.
Using a Pallette knife, add Texture Paste Crackle over the stencil and set aside to dry.
Black Heat Emboss one of the flowers from CMS479 Abstract Florals and fussy cut. I embossed two of the larger floral blooms at once.
Use Wilted Violet and Picked Raspberry Distress Watercolor Pencils to color the larger bloom. Use a watercolor brush to blend the colors.
Trim the base panel to 4.0 x 5.25 inches. Attach to a black cardstock panel 4.25 x 5.25 inches and an A2 card base. I did die cut a Scribbly Butterfly from the center of the back panel prior to attaching.
Stamp one of the sentiments on the lower left section of the panel. If the words are not completely stamped due to the paste, grab a black Micron pen and fill in the blanks!
Use foam tape to pop the bloom up and attach to the left side of the panel. Add a drop of glue to the center of the butterfly and attach on the right.
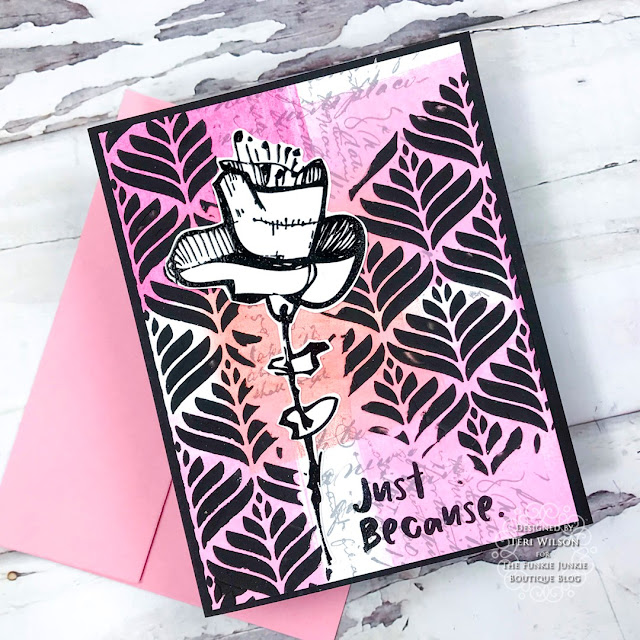
Next up is this very dramatic pink and black card.
The background is brayered with Picked Raspberry, Spun Sugar and Saltwater Taffy Distress Oxide Inks. I found that Oxide Ink was preferred. Ledger Script Stamp and Hickory Smoke Archival Inks add texture and interest to the background.
Use THS 181 and Black Opaque Texture Paste. Spread the paste in a curved area on the right and a vertical row on the left. Set aside to dry.
Check out the drama from the black paste on the bright card panel! Emboss and fussy cut the smaller of the blooms on white cardstock.
Once dry, trim the colored panel to 4 x 5.25 inches and mount on a piece of black cardstock 4.25 x 5.5 inches and add to an A2 card base.
Select a sentiment from the Abstract Floral Stamp set and stamp and emboss on the lower right. Glue to floral Bloom on the left side!
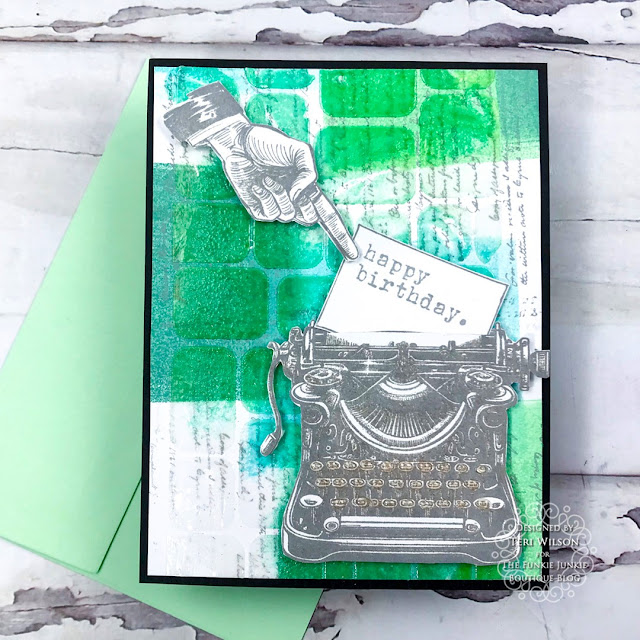
Trim to 4.0 x 5.25 and attach to a black panel 4.25 x 5.5. Add to an A2 card base.
Use Hickory Smoke Archival Ink to stamp the typewriter, letter with sentiment and the pointing finger from the Curiosity Shop Stamp set. I stamp twice so I can layer the cut outs. Fussy cut all and glue two layers together. Use foam tape to pop up the typewriter and the pointing finger.
Love the bright and cheery results.
Thanks so much for stopping by today! Be sure to check out The Funkie Junkie Boutique. They have an amazing selection of not only Tim Holtz products, but many other lines.
All of my channel and affiliate links are listed in the
Profile on Instagram. I would love to count you as a subbie friend. I
appreciate your support. By using my links, I earn a small commission at no
cost to you.
I'd
love to have you follow/subscribe on my social media sites Instagram, Facebook, Blogger and YouTube all
named TerisMailbox. Be well. Be creative!
Products used:
- THS 179 Layering Stencil Wheel
- THS 178 Labels
- THS 181Deco Leaf
- THS 183 Feather
- CMS 482 Curiosity Shop
- CMS 479 Abstract Florals
- CMS 241 Ledger Script
- Vault Scribbly Butterfly Die
- Cracked Pistachio Embossing Glaze
- Salvaged Patina Embossing Glaze
- Black Opaque Texture Paste
- Texture Paste Crackle
- Texture Paste Translucent
- Archival Hickory Smoke
- Archival Black Soot
- Spun Sugar Distress Oxide Ink
- Picked Raspberry Distress Oxide Ink
- Saltwater Taffy Distress Oxide Inks
- Salvaged Patina Distress Oxide Ink
- Cracked Pistachio Distress Oxide Ink
- Carved Pumpkin Distress Ink
- Picked Raspberry Distress Ink
- Peacock Feathers Distress Ink
- Twisted Citron Distress Ink
- Wilted Violet Distress Ink
- Mustard Seed Distress Ink
- Distress Watercolor Pencils


No comments:
Post a Comment