Showing posts with label Hero Arts. Show all posts

Jan 20, 2025

Add Texture and Dimension with Cardstock

 Hello crafty friends! Today I am posting for CutCardstock. Check out the texture and dimension I achieved using a variety of cardstock!

I have a short YouTube video here: https://youtu.be/rYMBlXQ5IzE

Create the Base Layer

Trim White Cougar 80 lb. Cardstock in half to 5.5 x 8.5 inches. Use an ink brayer and Distress Oxide Inks to create the base layer. Use green and blue inks to mimic a grassy scene.

This is one of my favorite techniques for subtle backgrounds with swaths of color! Trim the panels to A2 size.

Die Cut and Assemble the Elements

Use Cougar Natural 80. lb. Cardstock for the Mushroom bases plus Leesebo Cherry Cardstock for the mushroom tops. Lessebo Moss and another shade of green cardstock are perfect for the cute ferns. I used Bayleaf Cardstock (no longer available).

Use Vintage Photo Distress Ink with a small blending tool to add color under the mushroom tops. Fired Brick and Rustic Wilderness Distress inks add dimension when applied to the edges of the mushroom tops and ferns.

Use a small brush and white acrylic paint to add the spots on the mushroom caps. Glue the caps to the bases and allow to dry. Add Candies Apple Distress Ink to the small mushroom caps.

Create the Textured Frames

White Cougar Cardstock 100 lb. is a perfect weight for the frames. Trim the cardstock to A2 size. Die cut an arch in the center of the panel. Use Altenew's Wicker Texture 3D Embossing Folder to add texture and dimension.

Assemble the Cards

Use white glue on the embossed frame. Do not glue the bottom of the frame to allow insertion of the die cut pieces under the arch base.

Start by adding the green ferns, inserting the stem under the arched frame. Arrange the large mushroom and a small one over the ferns. Add small foam dots to the back of the medium size mushroom and place slightly over the large mushroom.

Add a sentiment of your choice. I used Taylored Expressions Sentiment Strips, die cut on Pop Tone Black Licorice Cardstock.

Attach to an A2 100 lb. Cougar White Cardstock card base. I make my own bases by trimming and scoring the sheets.

Take a moment to check out all the wonderful products available at CutCardStock. And just in time for Valentines Cards:

All of my channel and affiliate links are listed in the Profile on Instagram. I would love to count you as a subbie friend. I appreciate your support. By using my links, I earn a small commission at no cost to you.

Thanks so much for stopping by today! I'd love to have you follow/subscribe on my social media sites Instagram, Facebook, Blogger and YouTube all named TerisMailbox. Be well. Be creative!

#cutcardstock #cardmaking #sharehandmadekindness #handmadecards #handmade #papercrafting #papercraft #cardmakersofinstagram #cardmaker #papercrafts #scrapbooking #stamping #cards #cardmakinghobby #cardmakingideas #card #cardsofinstagram #handmad

Nov 16, 2021

Glitzy Holiday Ornaments

 Hello friends. I am posting these fun holiday cards for the challenge for A Blog Named Hero. The challenge theme this month is Glitz. You can enter our challenge by making a Glitzy card using at least some Hero Arts products. You will need to tag @ablognamedhero and also use the hashtag #abnhnovemberchallenge .

Everyone who enters has a chance to win one of two gift vouchers from our fabulous namesake and sponsor, @heroarts. Thanks as always to the lovely team @heroarts for supporting us! Be sure to enter your projects by using the hashtag #abnhnovemberchallenge by 5pm on the 26th of the month for your chance to win! I hope you will join in the fun.


Aug 16, 2021

Background Basics with Hero Arts

 Hi friends! Toady I am posting cards for the August Change. The blog is undergoing maintenance, so please post your entries on Instagram and tag #abnhAugustChallenge.  I am presenting 4 different cards spotlighting the Crafty Tools Background Stamp.


Aug 1, 2021

Background Stamping

 Hello friends! Welcome back! Today I am posting for A Blog Named Hero's August Challenge. I had so much fun creating this colorful background!


May 31, 2021

Time Saving Stamping and Die Cutting

 Greetings Stamping Friends! I purchased the Hero Arts 2021 April kit of the month after I saw the cool geometric animals and stencils!

I realized that a cool timesaver would be to keep most of the dies together and arrange the stamps to fit in the openings!


The first thing I did was to cut and remove the smaller images that were attached inside the larger dies.  This allowed me to create a stamping template.


The next step was to arrange the well loved stamps to coordinate with these openings in one of my Misti Stamping Platforms.

Once the stamps were arranged, I was off to the races! I die cut several sheets of the shapes ahead of time. When ready to stamp, all you have to do is match up the shapes within the template, ink the stamps and stamp away.


Once stamped, the images a already die cut and ready to go! 


I used the coordinating stencils to create a few backgrounds. Here are two of the cards I created!


I will use this technique in the future to save time stamping and cutting!  Look at your stash and see if you can do the same!

Thanks so much for stopping by today! I'd love to have you follow/subscribe on my social media sites Instagram, Facebook, Blogger and You Tube.  Be well. Be creative!


Mar 2, 2021

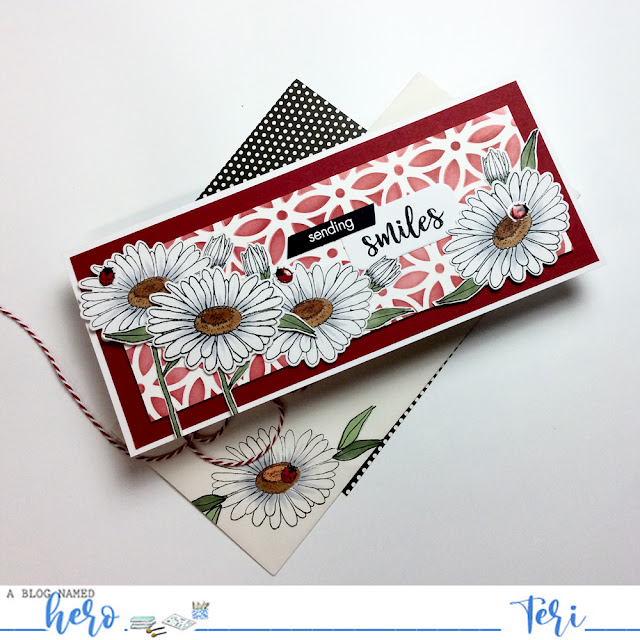
Die Cut Daisies

Greetings Crafty Friends. I am posting today for A Blog Named Hero's March Challenge Floral. I am so very excited to be a design team member this year! Check out their post here: http://ablognamedhero.com/2021/03/march-challenge-2/.

I am sharing the card I created:


I fell in love with this sweet Stamp and Cut Daisy and Bugs set.

May 27, 2020

Layered Ocean Card with CutCardStock

Hello friends. I have found myself participating in a variety of online classes and demos. Yana Smakula demonstrated “Painting with paper” in an Online Card Class recently. That got me thinking about background stamps I have that may be useful for this technique. I settled on a Hero Arts wave background. I hope you enjoy this tutorial for CutCardStock!

Mar 25, 2020

On a Roll with Envelope Boxes

Hello Crafty Friends! Have you found time to play with your craft supplies? I certainly have!
The A Blog Named Hero's Challenge is Anything but a Card. For those of us to make many cards, this is a little challenge!  I elected to make a few envelope boxes using a variety of My Monthly kits from Hero Arts.
 

Mar 23, 2020

Another Fun Envelope Box

Greetings Crafty Friends!  Having too much fun playing along with the A Blog Named Hero's monthly challenge. I decided to make a few envelope boxes using Hero Art's Monthly kits.


Mar 20, 2020

How about making boxes for your cards?

Greetings Crafty Friends! I hope you all are staying safe and finding some crafty time. I know I certainly am. The A Blog Named Hero's challenge this month is Anything but a Card!  I decided to make a few boxes for envelopes.


Jan 9, 2020

Jellyfish Sparkle

Wow!  The Jellyfish Party has to be one of my All Time favorite stamps from Hero Arts.  The Hero Arts Challenge is Sparkly this month and what better stamp to use than the Jellyfish?


Jan 8, 2020

Rainbow Happy Card

Playing around with Sparkly Stuff for the Hero Arts Blog Challenge! Too much fun. I love sparkles and rainbows!

Jan 7, 2020

Sparkly Fairy Card

I am having a great time this month completing the challenge posed by Hero Arts on their challenge blog. Today I present this fairy shaker card!

 After stamping, coloring and die cutting the fairy and flowers, I stamped another piece of Neenah cardstock with the Starry Nights Brushstrokes stamp. I swiped Distress ink in Milled Lavender and Salty Ocean on the stamp.

The opening is cut with the Hero Arts Rectangle Rounded corner die.  I dry embossed the front piece with the Hero Arts Spiral stencil.  I added foam tape around the window and the edge of the card, added sequins and attached the base layer.  I then glued the fairy and the flowers on the front of the card.


Here is the close up of the final card!

You can find the information on the Challenge Here.

Thanks for stopping by today. I would love to have you check out my other sites/channels. I am on Instagram, Facebook and YouTube.

Jan 6, 2020

Sparkly Peacock Birthday Card

The  Challenge from Hero Arts is right up my alley this month.  The theme is sparkly!

I love brightly colored Peacock Feathers. Add a little sparkle and Voila!


Jun 19, 2019

Another beach post

Greetings crafty friends!  I am sending this card to my son for his birthday! I had sooo much fun making this card using the Hero Arts Wave stamp and the Honey Bee truck die. I am posting this for Scrapsalot Use Teri10 for a 10% discount.


Apr 29, 2019

One more post for the Hero Arts challenge

I used the fairy stamp from the recent Hero Arts kit!  I just love this set.  So many great images and such a great value!


Mar 21, 2019

Hero Arts Embossing Challenge

Hello Craft Friends!

This month's challenge is embossing!  I've got that covered!  This Mandela stamp from Hero Arts is one of my all time favorites!  I use it all the time!

I white heat embossed the stamp on a piece of Cougar paper, and blended distress ink in an Ombre fashion.  I also ink blended the edges of the card base to match the main section of the card.  The sentiment is from a set in my stash!


I am entering this card in the challenge at A Blog Named Hero.

Have a wonderful day. Be well. Be creative!


Mar 9, 2019

Another Hero Arts Challenge Entry

Hello again crafty friends.  This is my second monthly entry for Hero Arts Challenge.


Hero Arts Challenge Entry

Greetings Crafty Friends!  I have been working on challenge cards this weekend.  I love taking a theme and building cards to fit.  Here is my entry for A Blog Named Hero’s Challenge.


Recent Posts