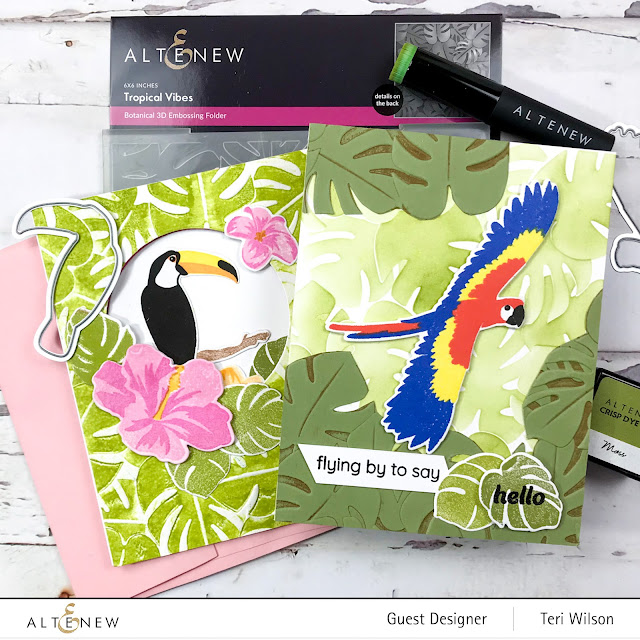
Hello friends. Ready to get in a tropical mood? Check out the new August Craft Your Life Tropical Vibes from Altenew! This set is part of their subscription plan. If you want to join in the fun, you need to subscribe by August 2 to be in line to receive this amazing kit! Subscription Affiliate link is HERE.
This set make me want to go somewhere tropical with lush flowers.
Create the Layers
Let's start with the layered Parrot card.
Start by stamping the parrot using bright colors. This layered stamp set is so easy to line up and create beautiful colorful birds! I used Azurite, Heartbeat and Maple Yellow for my parrot!
Stamp a couple of the leaves in Moss Green.
Die cut the parrot and the leaves.
Use the Stencil set to cover the front of an A2 size card base using Moss and Olive inks. Run a piece of Altenew's Satin Masking Tape up against the fold line on the left side to protect the card back.
Select a piece of Moss green cardstock and trim to A2 size. Use Milk Chocolate Ink to coat the raised size of the Embossing folder. Emboss as you normally would. Trim the leaves so you have a banner for the top and the bottom of your card.
Assemble the Card
Glue the leafy banner to the top and bottom of the card. Use Altenew's Foam Tape to pop up the parrot and attach to the center of the card.
Stamp the sentiment on white cardstock and trim to a banner with angled sides. Stack over another piece of cardstock. Attach to the card and add 2 jungle leaves.
Create the Layers
Line a white A2 card panel up with the front of an A2 cardbase. Tape a circle die in the upper middle section of the card. Die cut the circle and save the cut out.
Ink the positive section of the embossing folder using Olive Ink. Center the A2 panel with the circle cut out in the folder and run through your die cutting machine. Check out the dimension achieved!
Use the layering stamp set to create the Toucan, the branch, large and small Hibiscus flowers plus some of the leaves. Die cut all the images. Die cut some extra flower and leaf images to use on the inside front of the card.
Die cut another circle in a bright color for the inside of the card.
Assemble the Card
Attach the jungle leaf embossed panel to the A2 card base, lining up the circle cut-out. Glue the leftover white circle to the bright colored one centering the image. Line the white circle up with the front opening. The colored cardstock will be on to[ Add adhesive and close the card, back over front to assure good allignment.
Using the front opening as a guide, center the toucan on the branch. Add a small flower and leaf so a small section of the die cuts is visible from the front.
Add a few leafs and a large and small Hibiscus flower to the front. Pop the large flower up with foam tape.
Glue the extra white die cuts on the inside of the card to cover the back of the stamped images.
Stamp your sentiment on the inside of the card.
Here's a peek at the products:
I hope you enjoyed my tropical card tour Don't forget the deadline to subscribe is August 2nd. This kit will not be available separately.
I am using compensated affiliate links meaning I earn a small
commission at no cost to you. I appreciate your support so I can bring you new
content.
Thanks so much for stopping by today! I'd
love to have you follow/subscribe on my social media sites Instagram, Facebook, Blogger and YouTube all named TerisMailbox. Be well. Be creative!


.jpg)


No comments:
Post a Comment