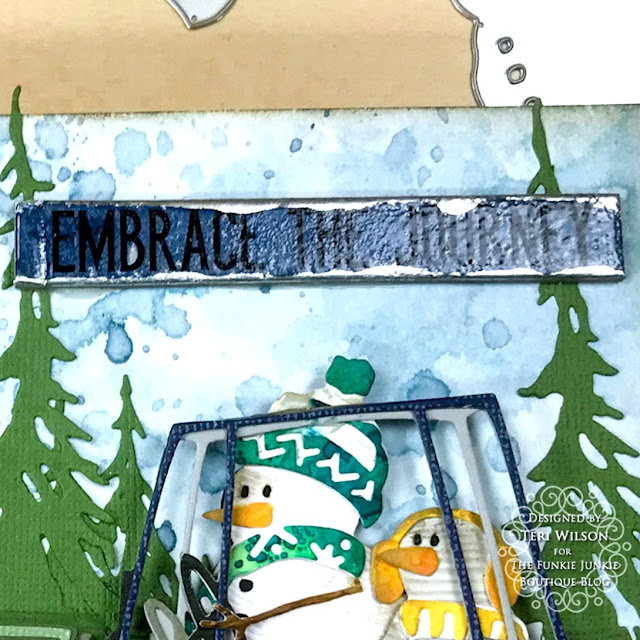
Hello friends. I'm posting this fun scenic card today for The Funkie Junkie Boutique. I had so much fun mixing a few die sets to create this scenic tag. As soon as I spotted the Road trip Die, I knew Twig and Stump needed to take a road trip!
As I often do, I have created a video if you prefer to watch the process. The link is here: https://youtu.be/TR6rhOrlZCk
Make the Background
Start by trimming a piece of Distress Watercolor Paper to the size of a Mini Etcetera Tag. Squish Speckled Egg, Weathered Wood and Tumbled Glass Distress Inks onto your craft mat. Run your fingers through so you don't have square imprints. Spritz water on the watercolor paper to help the inks flow together. Run the Watercolor tag through the inks to cover and heat dry. Dip and dry the tag until you are happy with the outcome. I was looking for a blue cloudy sky look for the scene. I also tore a piece of white cardstock long enough to cover the bottom of the tag for a snowy road.
Assemble the Die Cuts
The next step is to die cut and assemble all the die cuts. I used Road trip Colorize, Twig and Stump, Tall Pines and the Chilly and Freezy small snowman dies. You'll see I cut all the snowman with the recently released Woodgrain Cardstock. I love the texture it created.
The car itself has several layers that took me a little while to choose colors. I keep a box of 6 x 6 cardstock, much of it by Tim Holtz. In the end I decided to make a green and a blue car. Once the cars were assembled, I turned my attention to the other components.
The Chip Quote
I selected a chipboard quote strip "Embrace the Journey". I love using these heavy chipboard pieces on my tags. I used my embossing dauber to color the top of the piece and added Prize Ribbon Embossing Glaze. The glaze is fun to use and even when using a darker color, you can see the letters due to the translucency of the glaze. After heat drying the glaze, I used my fingers to add Sterling Foundry Wax on the edges and reheat.
Assemble the Tag
Collage Medium is the best medium to attach large and heavy pieces. I used the jar with a Collage Brush to attach the Watercolor Background to the Etcetera Tag. I always flip the tag upside down and add a weight to enhance the attachment especially to the corners.
After it dried, I started adding the die cut pieces, starting with the Tall Pines in the background. I love how this die fills in the space! I also edged the tag with Pumice Stone Distress Ink.
Twig and Stump were too tall to fit in the cars, so I let the tops of the figures stick out of the moon roofs on top. Also, to avoid have a Flintstone like card, I trimmed the bottoms to fit in the cars. My trick is to use clothes pines to hold the newly glued areas together.
I used Collage Medium to attach the Quote. A little Foam Tape was needed to level the cars out as there are many layers in each snowman.
Thanks so much for stopping by today! I'd
love to have you follow/subscribe on my social media sites Instagram, Facebook, Blogger and YouTube. I hope you will take a moment to explore The Funkie Junkie Boutique. Be well. Be creative!
Products used:
Stampers Anonymous Retro Snowflakes
Sizzix Tall Pines
Pine Branches Embossing Folder (Affiliate link)
Chilly and Freezy
Quote Chips
Embossing Dauber


No comments:
Post a Comment