Greetings friends! There is no challenge this month. Instead I am sharing some holiday cards for A Blog Named Hero featuring the new Hero Arts Layering Snowflake Bundle. My wish for you is that you have a peaceful, joyful holiday season filled with the love of family and friends.
We'd love to see what you create! Tag #ablognamedhero and me #terismailbox.
I ended up making 3 projects with this fun new stamp and die bundle.
- Line up a light blue 4.25 x 5.5 inch piece of cardstock with an A2 card base made with Cougar 80 lb. Cardstock.
- Center the snowflake die and run through your die cutter.
- Stamp multiple snowflakes all around the opening using Blue Hawaii Reactive Ink.
- Place the card base in a stamp positioner and line up the coordinating stamp and stamp with the same blue ink.
- Glue Clear packaging (from stamp sets) onto the back of the light blue cardstock and the front of the opening of the A2 card. Be sure the seal is tight around the opening. Let dry.
- Pour glitter or flat bling of choice onto the card base, keeping it in the center of the opening.
- Add adhesive around the opening and attach the blue piece to the card front.
- Stamp Merry Christmas to a strip of white cardstock and add matching lines using a Copic Marker in a coordinating color.
- Add another layer of cardstock and attach to the card front. Add additional bling if desired.
- Using the Mint Julip Ombre Stamp pad, stamp the medium and small sizes of snowflakes on a 4.25 by 5.5 piece of Cougar 80 lb. cardstock. Spritz with shimmer spray.
- Die cut to allow a frame around the piece using the Rounded Rectangle Infinity Die.
- To make the 3D snowflake in the center, stamp the medium snowflake on White 80 lb. Cougar Cardstock. Once dry, stamp again with Versamark Ink and add a layer of Clear embossing powder. Note: This is always easier to do with a stamp positioner.
- Line up two of the snowflakes and stitch using a sewing machine down the center of the snowflake. Fold the top sides up to create the dimension.
- Swipe the inkpad over a small piece of cardstock to create the sentiment. Cut using one of the smaller dies from the Infinity Die set. Mount on another piece of white cardstock allowing room for a frame. Center and cut the next size frame.
- Using a stamp positioner, stamp the snowflake wishes stamp using Versafine Ink and Clear embossing powder to make it pop.
- Mount the snowkflake on the top 2/3rds of the card and the sentiment near the bottom right. Attach a matching piece of cardstock to an A2 base, followed by the snowflake piece.
- A few blingy pieces and you are good to go.
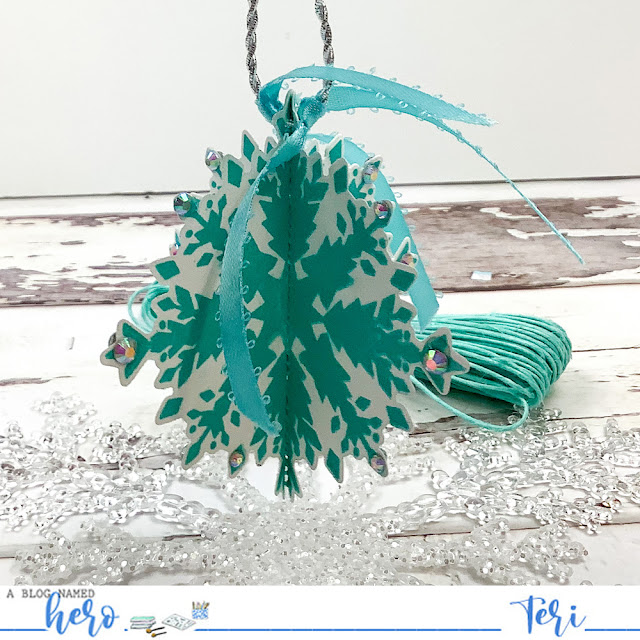
- Stamp two of the largest snowflakes in Pool Party Reactive Ink onto Cougar 80lb. Cardstock.
- Die cut using the matching dies. Be sure to keep the negative piece as you will use it to line the piece up to stamp the back of the snowflake.
- Place the negative piece in the corner of your stamp positioner. Turn the stamped snowflake over and line it up inside the negative piece.
- Line the snowflake stamp to match the die cut opening and stamp. Repeat for the second snowflake.
- Line up the 2 snowflakes and stitch down the center. Gently fold the snowflake to create a 4 dimensional ornament.
- Add blink if desired!


No comments:
Post a Comment